Happy Friday! Even though everything is already decorated for Christmas, stores have started playing Christmas music and there is Christmas everywhere you turn I am still just sticking to one holiday at a time. Don’t get me wrong I am a huge fan of Christmas and can’t wait to play my Christmas music, but I really don’t like how people skip over Thanksgiving.
So, to fully appreciate the upcoming Thanksgiving holiday I have some great posts planned for the next 2 weeks. Today’s Friday Foodie post was inspired from the traditional Thanksgiving cornucopia, or horn of plenty. The cornucopia is a traditional symbol during Thanksgiving as it can usually be found filled with items from a fall harvest. I found some amazing ideas on how you can make your own cornucopias this year for Thanksgiving.
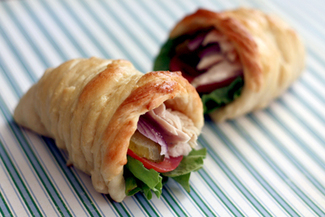
Cornucopia Sandwiches
To make these cornucopia sandwich rolls you will need bread dough, foil, non-stick spray, an item to mold your foil around (cups, more foil, cardboard, etc.), egg wash and a baking pan. To make your mold you can follow the step-by-step directions I found from Diamonds for Dessert below. Depending on the size cornucopia you want to make just adjust your mold accordingly. Once the mold is done you will want to spray the foil and then wrap the dough around the mold in strips. Once the mold is covered brush a light egg wash onto the outside, place on the baking sheet and put it in the oven according to the bread’s cooking instructions. This cornucopia shaped bread can be made into any size so you can use it to make sandwiches, centerpieces or food displays like the one I found on AllRecipes.com.
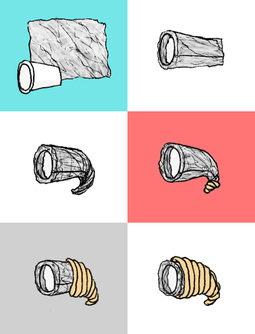
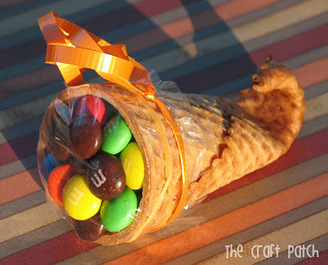
Cornucopia Treats These are a little simpler to make and can be filled with any delicious fall treats like the Fall Party Mix I made a few weeks ago. To make these you will need waffle cones, water, a bowl, a microwave, and a pencil. Take the waffle cone and dip the end of the cone into a bowl of water for about 20 seconds. Next place the cone into the microwave for 20 seconds (until softened). Once softened, remove from the microwave and wrap the end around a pencil, to form the curl, and let dry. To finished, fill with your own fall goodies.
When it comes to fun ways to transform your food to match the event theme I am all for it. And these cornucopia treats are perfect for a Thanksgiving celebration! What other ideas can you think of for some Thanksgiving themed foods?
Don’t forget this Sunday is Veteran’s Day. Remember to thank those that you know or run into that day for their service to this country! Have a great weekend!!
xoxo
Megan You might also like… Give Thanks Fall Party Mix Fall Party Centerpiece
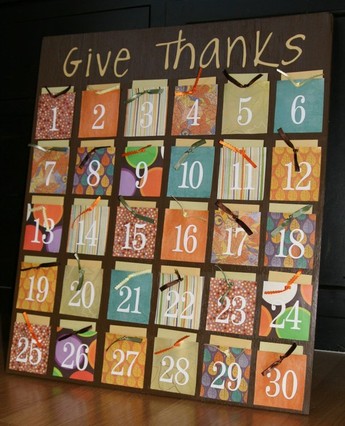
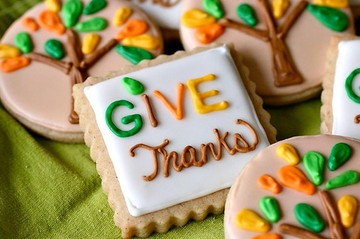
November is a time when a lot of us remember to give thanks for everything and everyone that is a part of our life. Starting on November 1st I saw quite a number of my friends start listing a daily “I am thankful for…” statement on their Facebook profile. Today I have found some great ideas on how you can show what you are thankful for. Give Thanks Calendar. A fun family activity that you can create yourself is this give thanks calendar. Each day you can write down what you are thankful for and then at the end of the month pull them all out and read them. Save all your cards for the following year and you can continue adding new thanks each year. You can make your own by following these step-by-step instructions from Jellybean Junkyard. A Thankful Tree. Create or buy a tree that you can hang small tags all over like this one from Simply Vintage Girl. Any one that comes to your house, office or classroom can see the tree and write what they are thankful for and hang it on the tree. Once filled with “thanks” the tree makes a great room decoration. Give Thanks Cookies. Making a small treat and giving it away to those that you are thankful for is an easy way to show your thanks this month. You don’t have to get as creative as these cookies from Annie’s Eats as anything that you take time out to put together will be appreciated by all who receive them. What are you thankful for? Do you have a fun way to share what you are thankful for? Share your ideas below! Don’t forget Thanksgiving is just 2 short weeks away!!!
xoxo
Megan
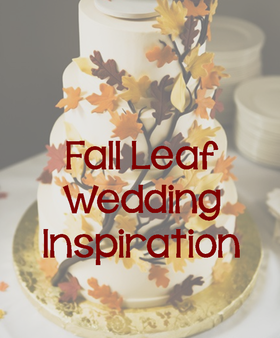
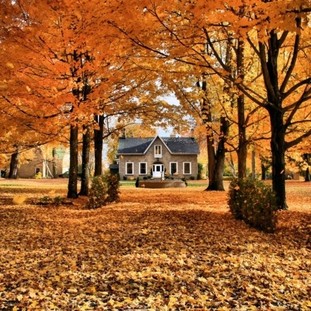
With November already 1 week in I have finally come to admit to myself that fall is here. However, there is one thing about fall that I love: the colorful leaves. Living in the Shenandoah area you get to see all the trees change to beautiful reds, yellows and oranges during this time. For all fall occasion this can make for a wonderful outdoor backdrop and can provide some great décor inspiration.
Today’s Wedding Wednesday post is entirely inspired by these fall leaves. From the décor accents to the wedding cake the simplicity of the leaf can be the perfect fall accent.
The perfect way to incorporate the fall leaves is through the outdoor décor. Find a great indoor/outdoor venue site with trees that will offer a fabulous fall setting. Even though it may be cold arrange with your photographer to get a few pictures taken outdoors.
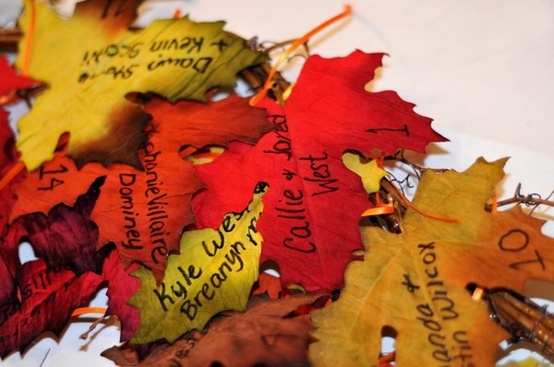
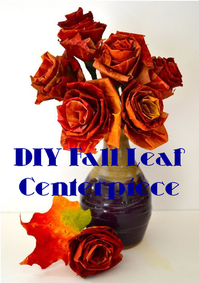
Moving onto your tables you can keep the décor simple with fall leaves as they add lots of color variation. You can create your place cards from leaves or leaf cutouts as an easy DIY project and it adds great color to your table setting. Also incorporating leaves into your centerpiece with or without flowers adds the perfect fall touch.
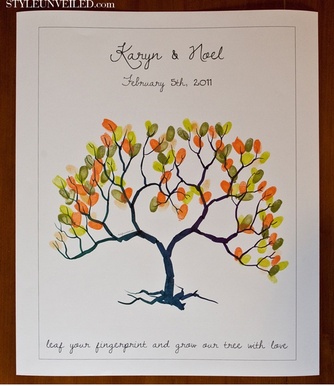
When it comes to a fun wedding keepsake you can’t go wrong with the thumbprint tree that your guests can create and sign. I love creative ideas like this instead of the traditional guest book. You can download your own wedding tree at Style Unveiled.
If you haven’t been watching TV, listening to the radio, reading the newspaper, or going out into society you may have missed that today is Election Day. Want to have a little fun waiting to find out who is going to be the next president? Invite your friends over tonight for a fun Election Day party. Here are some great ideas that you can easily pull together.
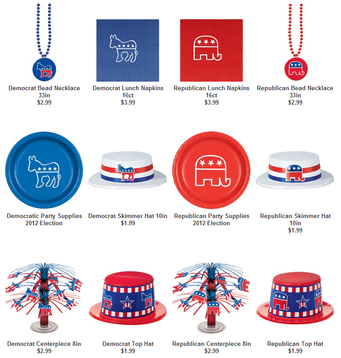
An easy start to creating the perfect Election Day party is to stock up on some festive red and blue table ware. Party City has enough items to choose from for a dueling Election Day party.
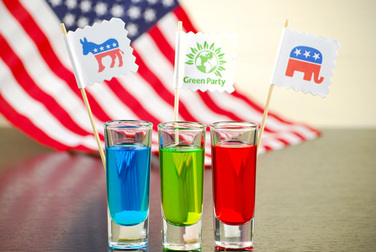
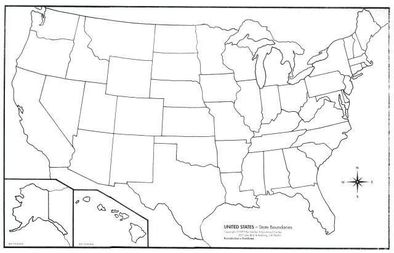
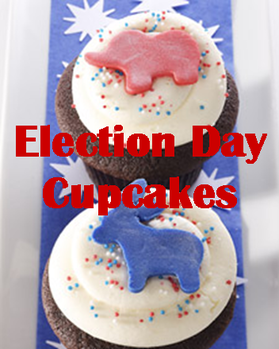
Kick your party off with some yummy red, white and blue treats. These Election Day cupcakes are delicious no matter the party affiliation. Serve Election Day shooters. You can even turn it into a game as the results come in tonight. (rules are yours to create) Find out how to make these shooters from She Knows Food and Recipes blog. Create a game for your guests by handing out state maps and red and blue markers when they arrive. Ask each guest to fill out their predictions and then have a big state map to fill in as results come in. See who can get the most correct states.
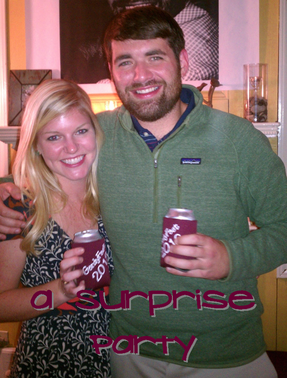
Happy Happy Monday to you all! I hope everyone had a good weekend and have rested up from all of last week’s Halloween fun. I know it was Halloween, but instead of attending Halloween festivities on Wednesday I celebrated one of my friend’s birthdays (he is a Halloween baby).
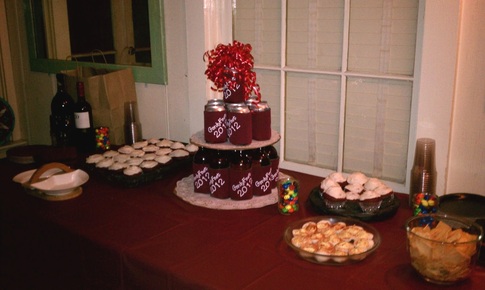
His girlfriend wanted to get all his friends together to celebrate and asked for some help with getting everything planned and put together. The birthday boy went to USC which gave us the event’s colors and the food selection was all his favorites. This included red velvet cupcakes (USC colors of course!), pizza rolls, peanut M&M’s, chicken nuggets, cheese puffs, and a few other finger foods.
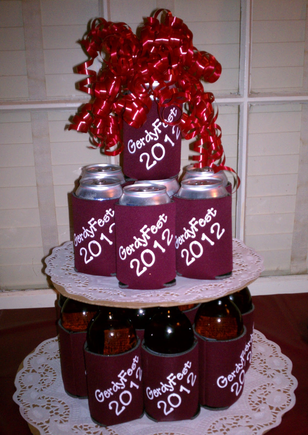
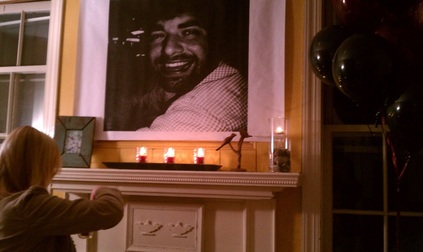
The best creation was the beer cake using the birthday boy’s favorite beers and custom made koozies that were made just for the occasion by etsy store owner BarraKoozie. The birthday boy is never without a koozie so he loved every part of the cake! To add some humor to the décor, his girlfriend thought it was be hysterical to blow up pictures of the birthday boy to create fun birthday posters. You can get posters like these made the same day at Kinko’s on basic printing paper without spending a lot.
As with any successful surprise party the best part was that the birthday boy had no idea about the party! Everyone had a great time celebrating their friend’s birthday and it made for a perfect event evening! Have you had a surprise party planned for you before? What would be your must-haves when planning a surprise party?
xoxo
Megan
As this event comes around only once every four years there should be no better excuse than to throw a party for the election this upcoming Tuesday, November 6th. An easy election day treat to make are these Election Day Cupcakes from none other than Martha Stewart. To make these “party” treats you will need: - 1 1/4 cups all-purpose flour, sifted
- 1/2 teaspoon baking soda, sifted
- 1/4 teaspoon salt
- 1 cup milk
- 1 1/4 teaspoons pure vanilla extract
- 1/2 cup (1 stick) unsalted butter, preferably European-style, room temperature
- 1 1/4 cups sugar
- 2 large eggs, room temperature
- 1/2 cup cocoa powder, sifted
- 1 (24-ounce) package fondant
- Red or blue paste food coloring
- Silver edible glitter
- Red, white, and blue nonpareils
Step 1: Preheat oven to 350 degrees. Line a standard muffin tin with 12 cupcake liners; set aside. Step 2: In a large bowl, whisk together flour, baking soda, and salt; set aside. In a small bowl, add milk and vanilla extract; stir to combine and set aside. Step 3: In the bowl of an electric mixer fitted with the paddle attachment, cream together butter and sugar until light and fluffy, about 5 minutes. With the mixer on low, add eggs, one at a time, mixing well after each addition. Add flour mixture in three parts, alternating with milk mixture; beat until just combined. Add cocoa powder and beat until just combined. Step 4: Fill each muffin cup two-thirds full with batter. Transfer to oven and bake until a cake tester inserted into the center of a cupcake comes out clean, 18 to 20 minutes. Let cool in pans for two minutes before transferring to a wire rack to cool completely. Step 5: Transfer frosting to a pastry bag fitted with a large 5/8-inch round tip (such as Ateco No. 808). Pipe frosting onto cooled cupcakes and set aside. Step 6: Meanwhile, press your thumb into the center of the fondant to make a well. Place a small amount of food coloring (red for Republican, blue for Democrat) in the well and knead fondant until color is well blended. Continue to add more food coloring to fondant until desired color is achieved. Roll out into a 1/16-inch-thick sheet. 7: To make Republican elephants, cut out 12 elephant shapes using 2-inch elephant cutters. Sprinkle with edible glitter. To make Democrat donkeys, cut out 12 bear shapes using a 2-inch bear cutter. Using a 2-inch daisy cutter, cut out enough daisy shapes so that you have 36 petals; sprinkle bear shaped and daisy petal fondant with edible glitter. Top each cupcake with a fondant elephant or bear, using two daisy petals to make donkey ears on each bear and one petal to make the tail. Sprinkle cupcakes with nonpareils and serve. Are you going to the polls on Tuesday to vote? Have a great weekend!! xoxo Megan
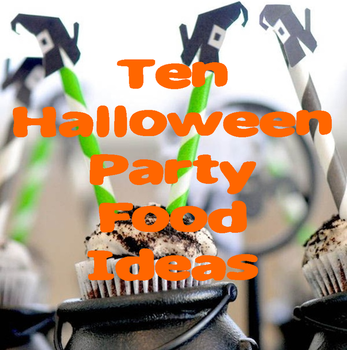
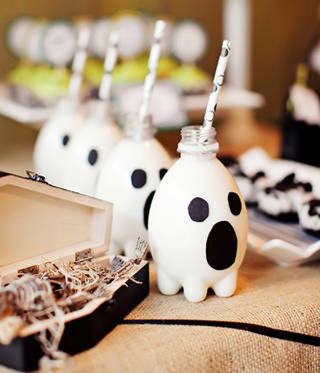
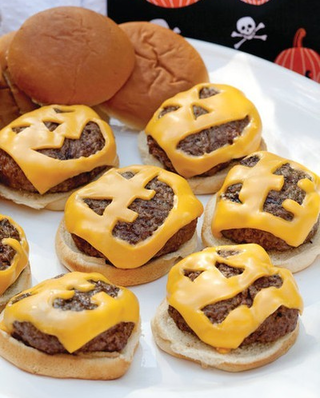
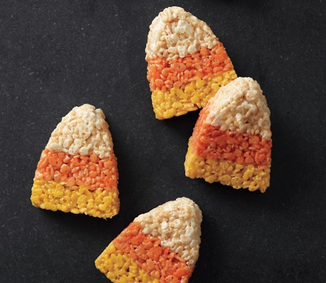
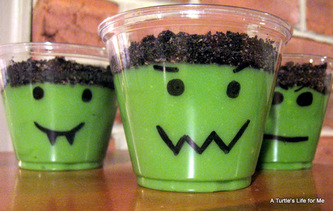
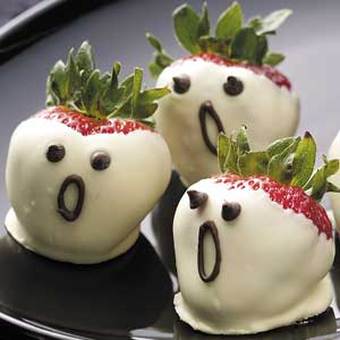
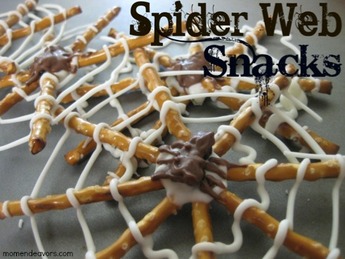
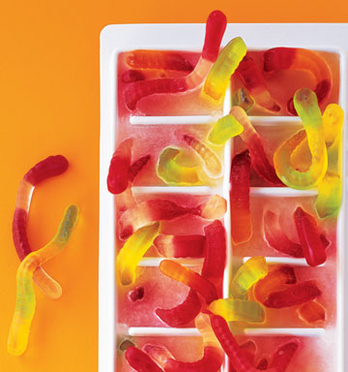
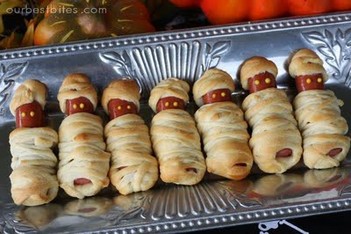
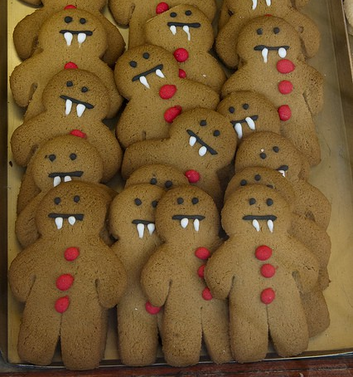
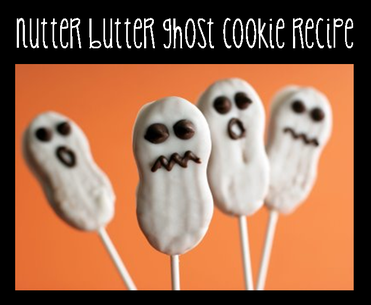
Last week I shared with you how to make a Halloween treat: nutter butter ghost cookies. While searching for an amazing Halloween food idea to share with you last week, I came across so many great Halloween food ideas. So for today I have put together 10 of my favorite Halloween themed party food ideas for you. Enjoy!1. Ghost Drinks. Take the aquapod water bottles, remove the label, paint white and then add a ghost face. You could also paint them orange and turn them into a pumpkin. Idea from Kara's Party Ideas. 2. Cheeseburger Jack-o-Lanterns. Turn your burgers into Halloween jack-o-lanterns by cutting out a pumpkin face from the cheese. Idea from Red Ted's Art Blog. 3. Candy Corn Rice Krispie Treats. This easy to make treat looks like the seasonal favorite, but turned into the kid favorite rice krispie treat. Idea from Martha Stewart Living. 4. Monster Pudding Cups. Take the traditional pudding recipe, add a little green coloring, top with oreo crumbles and draw a monster face on the cup. A perfect traditional dessert guests of all ages will love! Idea from A Turtle's Life for Me. 5. Chocolate Dipped Boo-Berries. Turn strawberries into white chocolate dipped ghosts for a Halloween party treat. Idea from Taste of Home. 6. Monster Jaws. Decorate apple slices with monster faces for a healthy Halloween treat. Idea from Our Best Bites. 7. Spider Web Snacks. With some melted white chocolate wafers turn pretzels into some creepy spider web treats. Idea from Mom Endeavors. 8. Gummy Worm Ice Cubes. Turn any drink into a spooky one with gummy worm ice cubes. Idea from Martha Stewart Living. 9. Mummy Dogs. Turn your traditional pigs in a blanket into Mummy Dogs which both kids and adults will love. Serve with a ketchup "blood" dip. Idea from Our Best Bites. 10. Vampire Gingerbread Men. This was one of my favorites as I have grown up with my grandmother always making gingerbread men for holiday treats. Now they can also be made for Halloween by turning them into vampires!
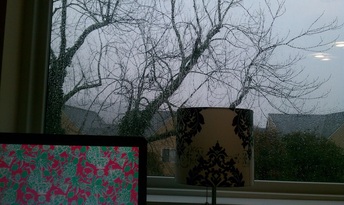
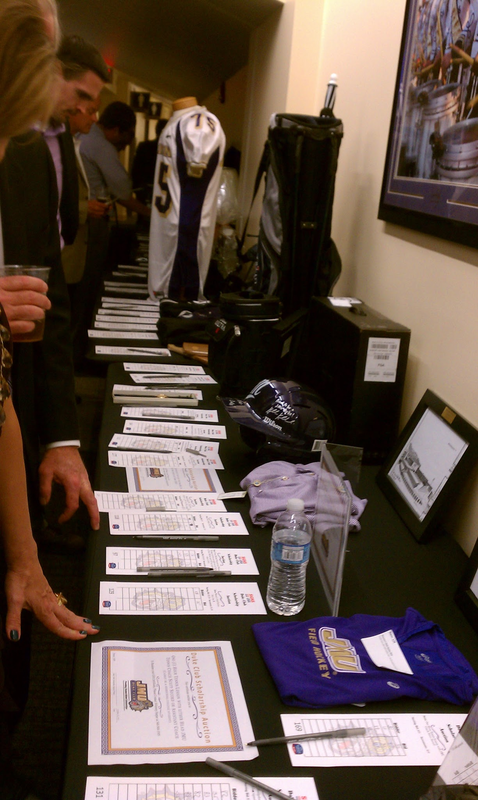
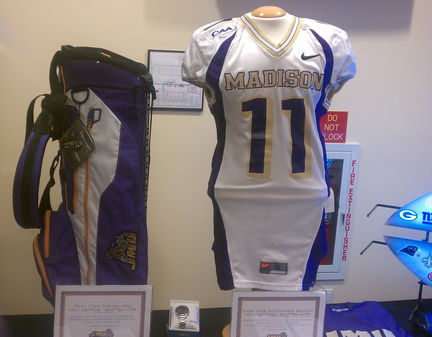
I hope everyone's weekend went well. I hope everyone that is being hit/going to be hit by Sandy aka Frankenstorm (those weather people think they are so funny with their Halloween play on words) is all prepared and safe. Today's site from my window isn't too happy to look at with all this gloom and rainy weather. Hopefully it will pass by soon and with no power outages. (fingers crossed!!) I had a much better weekend before all this weather came through. On Friday night I headed up to JMU for a great fundraising event that is hosted by the JMU Duke Club; The Duke Club Scholarship Auction. This yearly event is their biggest fundraiser for student-athlete scholarships. They organize a silent and live auction with over 200 items for the guests to bid on. I have always enjoyed this event as it is a great social gathering each year at JMU. When it comes to planning an auction fundraiser there are a few important things to remember:
1. Have a diverse selection of items. Your goal is to have at least 1 item that will appeal to each person walking through your doors that evening.
2. Have original items. Find items to auction off that your guests will not be able to purchase anywhere they want to. The more original the item the more appealing it will be to your guests and the more money you will be able to get.
3. Add descriptions. People will not bid on an item that they do not know about. A great way to inform your guests on the item displayed is to include a description with the item. A fun new "modern" way to do this is to attache a QR code to your items that your guests can then scan and learn more about through their phone. Just make sure to advertise this before hand to your attendees so that they come prepared.
4. Stagger ending times. When you have an auction with a large number of items it is a good idea to have staggering end times for bidding. Your goal is that you want to allow everyone an opportunity to be able to walk away with an item at the end of the evening. If you have all your auction items ending at the same time it will become very chaotic with people trying to bid on multiple items and it is very hard to keep track of everything. Staggering your ending times allows people who did not win anything from the first group of items to bid on something else.
5. Have fun! Remember that this is a fundraising event for a good cause. Even if you end up paying a little more than what the item cost just remember that your money is going towards a good cause.
Have you been to a fundraising auction before or planned one? What are some tips that you have for those attending and for those that are planning one? Share your tips below! And for those on the east coast today: stay safe!!
xoxo
Megan
It’s finally Friday!!! I thought a fun way to celebrate the end of the week would be with a fun Halloween themed treat; Nutter Butter ghost cookies.
To make these ghost cookies you will need:
- Nutter Butter Cookies
- White Chocolate Wafers
- Mini Chocolate Chips
- Chocolate Frosting
- Cookie Sheet
- Pot or Glass Bowl to Melt Chocolate
- Wax Paper
- Piping Bag
- Optional: Lollipop Sticks
Step 1: Melt the white chocolate wafers per their melting instructions. I have always melted my wafers in the microwave in a glass container. You just have to be careful that you don’t overcook the chocolate by zapping it in 60 second increments and stirring regularly.
Step 2: **If you want to have your ghost cookies on lollipop sticks you will want to insert the candy stick into the cookie before dipping it in the white chocolate.**
Step 3: Once the chocolate has melted dip each nutter butter to have it be fully covered. Lay them onto a sheet of wax paper to cool.
Step 4: While the white chocolate is still warm take two mini chocolate chips and create your ghost’s eyes and use the chocolate frosting to pipe on a mouth.
Step 5: Let your ghost completely cool before serving. If you are in a rush you can stick your ghost cookies into the fridge.
Enjoy!! What is your favorite cookie treat? Have a great weekend!!
xoxo
Megan You might also enjoy… Halloween Party Costume ContestA Pumpkin PartyTuesday Ten: Pumpkin Party IdeasA Harry Potter PartyHarry Potter Treat Bags
|


 RSS Feed