Yes, I know it is Wednesday, but for some reason I forgot to hit publish on my post yesterday. So just to mix it up a little bit here is your Tuesday post on Wednesday! Maybe it will make the weekend get here quicker? Here is to being hopeful!
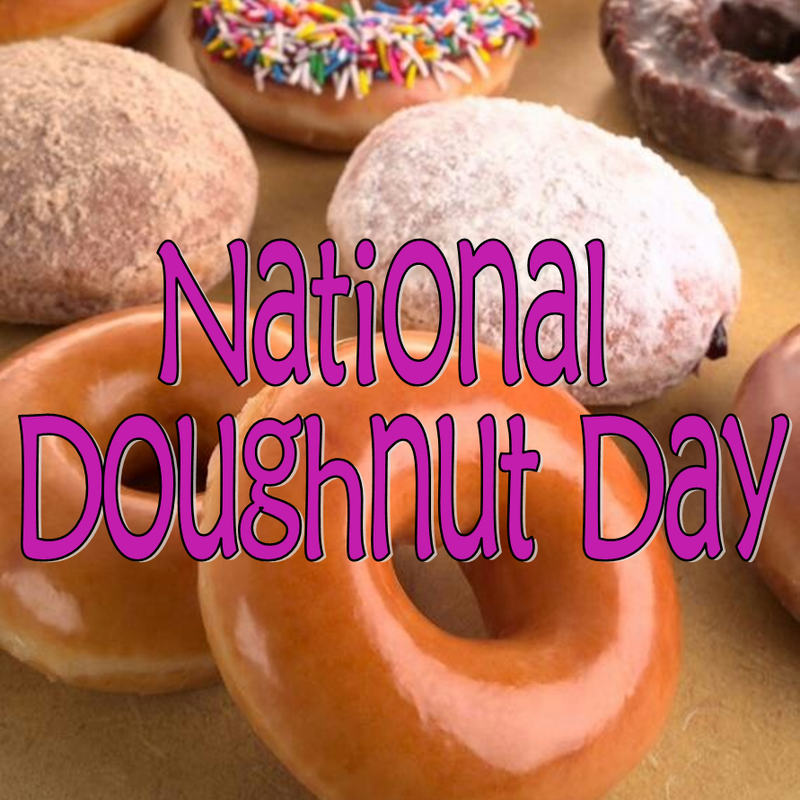
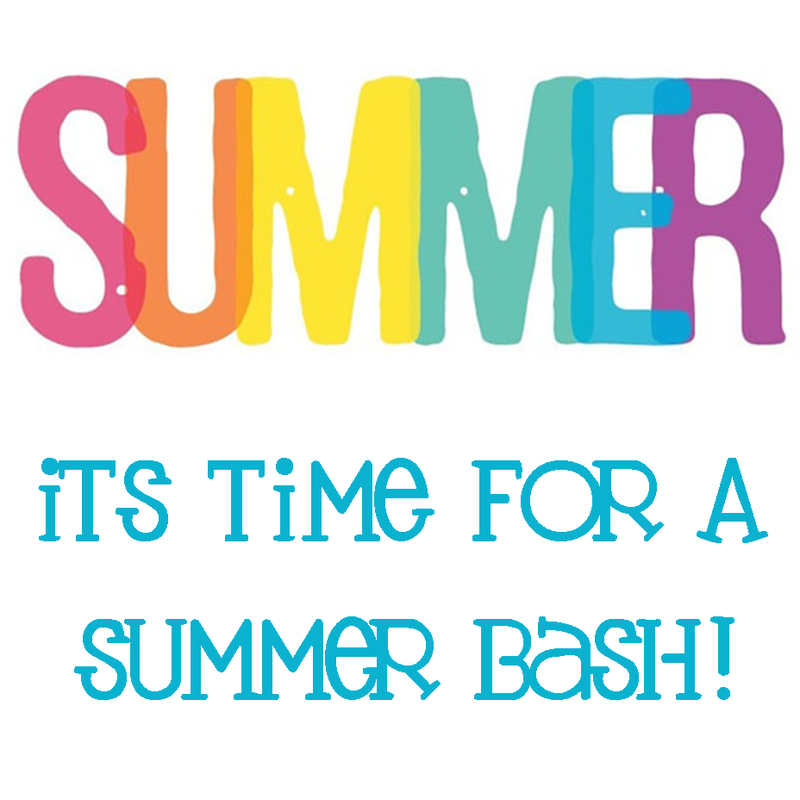
With the start of another month it means it's time to pull out those calendars and get ready to schedule in some fun reasons to celebrate! For June I have put together a list of exciting reasons to take the party outside and kick off a summertime of fun. Just make sure that you have plenty of sunscreen as you are going to need it for these June celebrations... 1. June 6th: National Doughnut Day. Now if only a Krispy Kreme wasn't so far away from me. Road trip? 2. June 6th-8th: National Lemonade Days. have you heard of Alex's Lemonade Stand? This is a great cause that was started 10 years ago to help raise money and awareness of childhood cancer. Click here to learn more about this cause and find out how you can host your own lemonade stand this year. 3. June 14th: National Bourbon Day. The best way to kick off summer? With a cool and refreshing drink of course! Take today to perfect your drink mixing skills with this mint julep recipe or other bourbon drink favorites. 4. June 15th: Father's Day. Today is the perfect day to celebrate dad! Or your granddad, stepdad or the fact that you are a dad. Happy Father's Day to all those amazing dads out there! 5. June 20th: National Flip Flop Day. While this is the day before summer begins I think this is the perfect time to celebrate the official shoe (I prefer going barefoot, but if you must wear something) of summer. Now, I have always wondered this - what do you call one flip flop? 6. June 21st: First Day of Summer. Besides Christmas this might be my favorite holiday of the year. I love summer and CANNOT wait for it to get here. Let's party!! -and also on June 21st- 7. June 21st: National Wear Your Lilly Day. For all those Lilly Lovers out there, there is truly no better way to celebrate the first day of summer than by wearing your Lilly. What will you be wearing in celebration this year? 8. June 23rd: Let It Go Day. Be prepared to spend all day singing Disney's Let It Go in celebration of this holiday. What a great way to celebrate the things you need to let go. 9. June 27th: Sunglasses Day. With summer in full swing you want to make sure that you never leave the house without your shades! 10. June 28th: Great American Backyard Campout. Before the summer evenings get too hot to handle, take some time out to celebrate the outdoors and support the National Wildlife Foundation. What is on your bucket list for this summer? Have a happy day!
xoxo
Megan
You might also like...
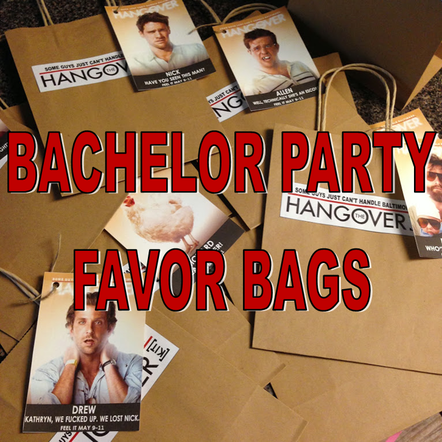
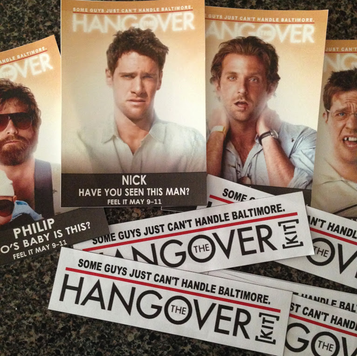
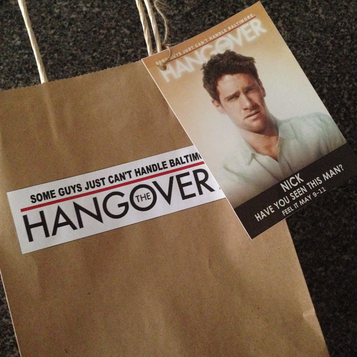
A few weeks ago one of my friends came to me for help. He was attending a bachelor party for one of his college buddies and wanted to put together a favor bag for all the attendees and wanted to know if I had any ideas. Now, I have helped organize, plan and run most every aspect of a wedding but never thought I would ever need to help with a bachelor party. So after talking with my friend about what they would be doing (general plans only lol) I took to Pinterest to see what I could come up with that stayed within the budget and that the guys would all get a kick out of. There are a number of great ideas but my favorite were these Hangover Kit bags from blogger He Asked. I Said Yes. They were really easy to make and all the guys loved them at the bachelor party! Here is how you can make your own Hangover Kit bags... Materials- brown paper bags
- twine
- hole punch
- glue
- scissors
- customized tags
Instructions1. I took each poster image from The Hangover's IMBD page, imported it into Publisher and then added my own customized touches. I also created the bag labels using Publisher. Here were some of my finalized tags. 2. Next I glued the bag labels on and tied on each person's customized tab to the handle with the twine. 3. After all the bags were put together they were ready to be filled. Some great items that you could include are mini water bottles, mini Gatorade bottles, aspirin, gum or mints, airplane bottles, cigars, plastic sunglasses, tums and any other trinkets that relate to the weekend festivities. You could turn your bags into pre or post hangover bags - or both!
What other great Bachelor Party favor ideas have made or seen?
xoxo
Megan
You might also like...
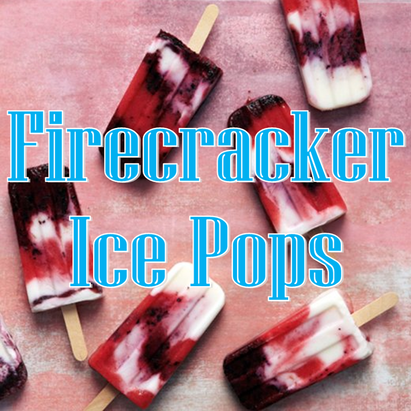
Being sick really throws your week for a spin when you had everything planned out, especially before a holiday weekend. Luckily, I have (almost) fully recovered and cannot wait to spend some time down at the beach celebrating a fun Memorial Day weekend. It has been way too long since I was last down at the beach house and I cannot wait to get my toes in sand and get back out in the ocean for some paddleboarding! So to get you in a festive beach - I mean Memorial Day Weekend celebration here is a great patriotic dessert thanks to the entertaining goddess Martha Stewart. Ingredients - 1/2 pound strawberries, hulled and quartered (1 1/2 cups)
- 1/4 cup sugar
- 1/2 pound blueberries (1 1/2 cups)
- 1 1/4 cups low-fat plain yogurt
Directions - In a food processor, puree strawberries with 1 tablespoon sugar then transfer to a small bowl.
- Next puree blueberries with 1 tablespoon sugar.
- For your final layer whisk together yogurt and 2 tablespoons sugar in a separate bowl.
- Pour the 3 mixtures, making sure to alternate colors, into ten 3-ounce ice-pop molds, making 3 to 5 layers in each. With a skewer or thin-bladed knife, swirl mixtures together in an up-and-down motion. Insert ice-pop sticks and freeze until solid (2 1/2 to 3 hours or up to 1 week).
You now have some delicious red, white and blue (& healthy) patriotic treats just in time for this weekend's Memorial Day celebrations. What are your plans for this Memorial Day Weekend?
xoxo
Megan
You might also like...
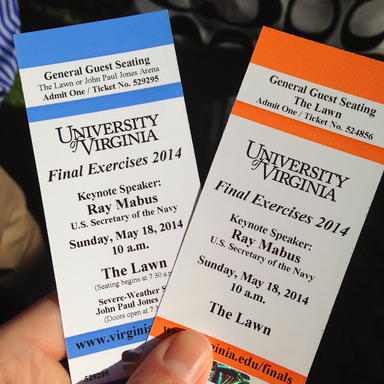
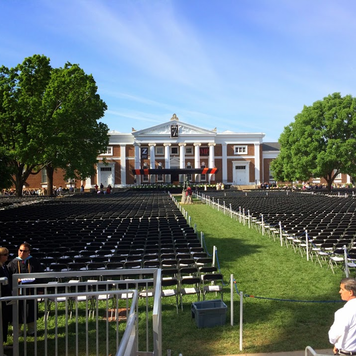
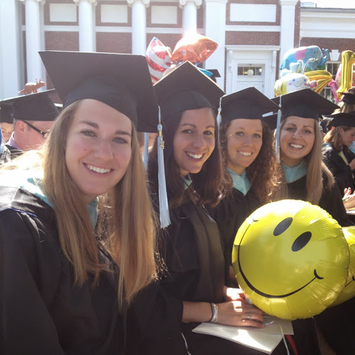
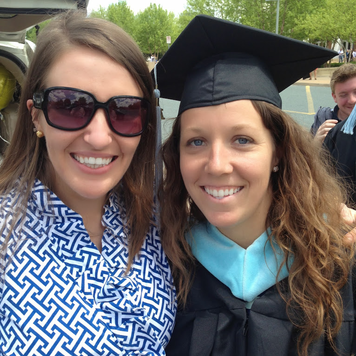
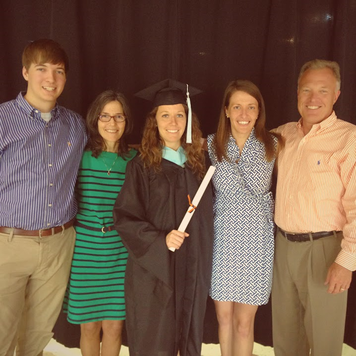
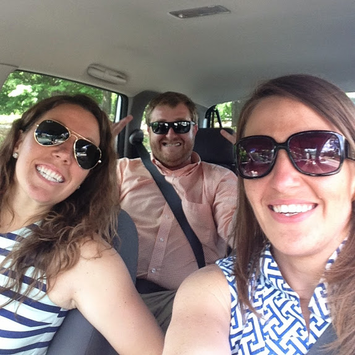
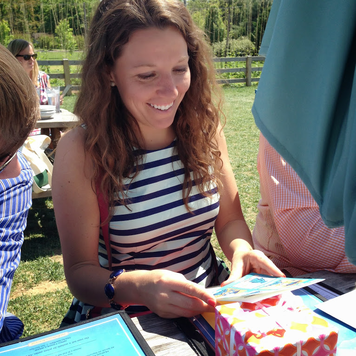
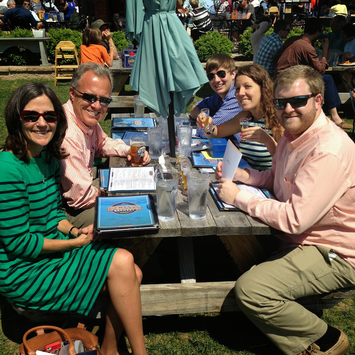
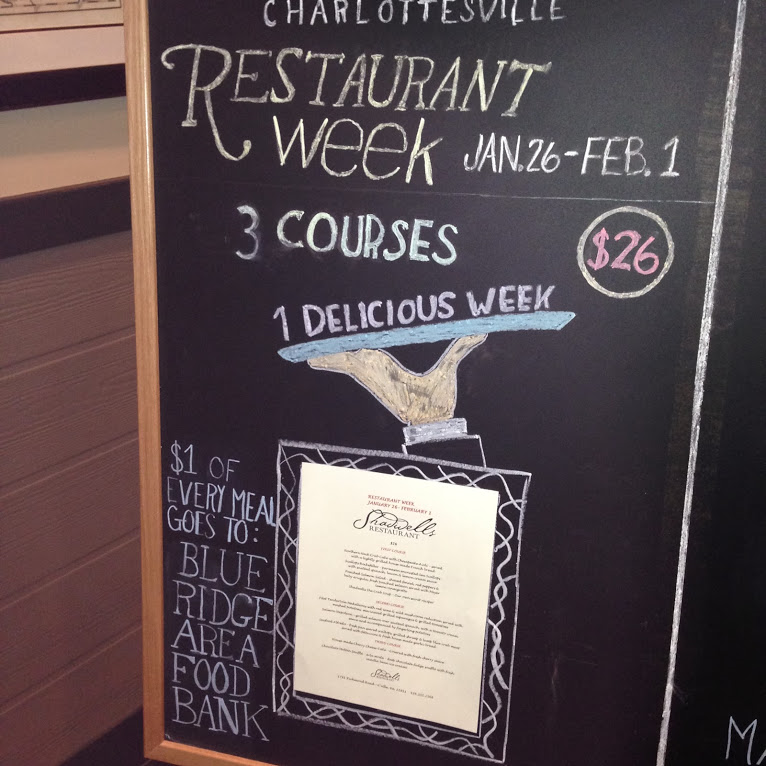
Living in a college town makes for one crazy weekend when graduation rolls around. And what made it even more crazy was that my sister was actually getting her Master's degree from UVA this past weekend. So between working grad events to attending grad events it was one busy weekend in Charlottesville. I made sure to take plenty of pictures as we we bouncing from one event to the next all day long. Here are some of my favorites from yesterday's graduation celebration...
The weather could not have been better for an outdoor graduation ceremony. The beautiful graduates smiling for the camera. My sister, the graduate, at our pre-diploma ceremony tailgate. You made it! Diploma in hand and ready to take on the world! Present time! Success on picking out the perfect graduation card! Cheersing to the grad while enjoying a sunny afternoon outside at the brewery. Have you been celebrating anyone's graduation recently? What did you do to celebrate?
xoxo
Megan
You might also like...
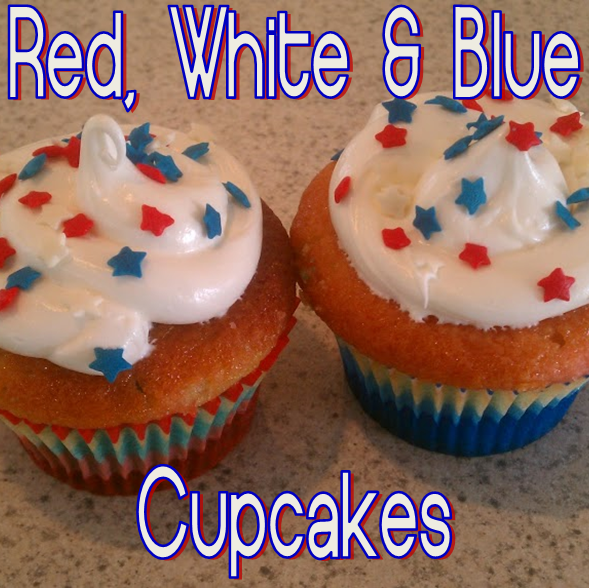
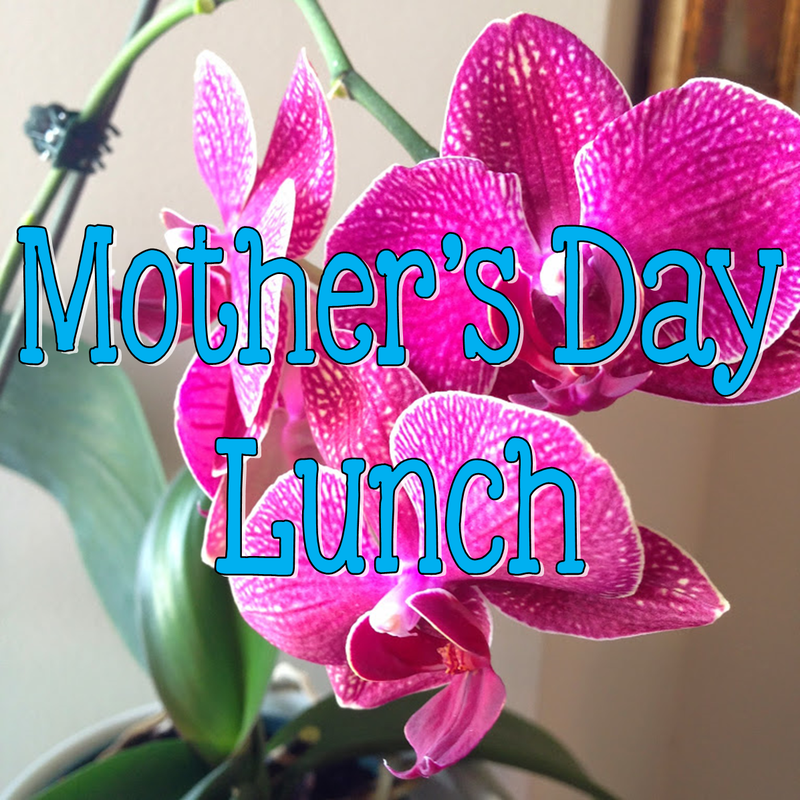
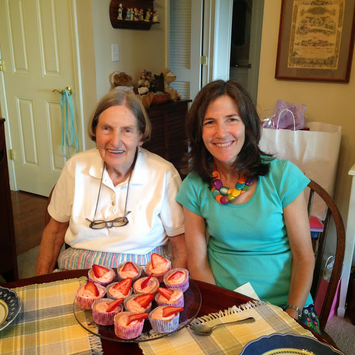
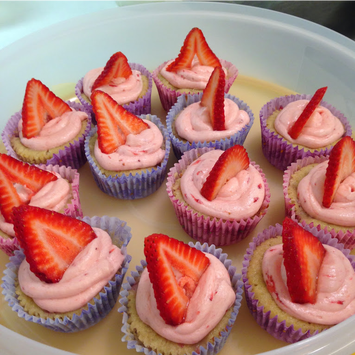
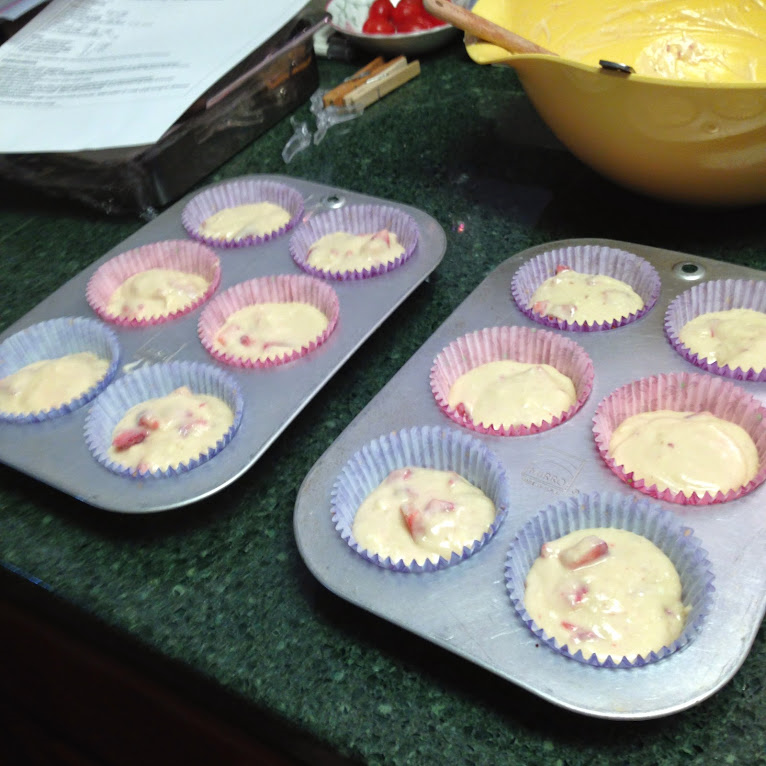
I had such a fun weekend celebrating Mother's Day with my mom and grandma this past weekend. I threw together a fabulous lunch, created a colorful bouquet of flowers, and tried out a recipe for strawberry cupcakes that I ran across on Pinterest for dessert. We all had such a great time together on Sunday and I cannot wait until the next time we are all together to celebrate. Here are some great pictures from our Mother's Day celebration as well as the delicious cupcake recipe I made.
A big thanks to WholeFoods for always having beautiful bunches of flowers to choose from. I could not have put together this Mother's Day bouquet without them! A beautiful picture of my mom and grandma on Mother's Day! So happy I was able to celebrate with you two! And while my cupcakes didn't look exactly like the ones from blogger Life, Love and Sugar, they were just as delicious (I promise!). Big thanks to my dad for the final touch with the strawberry slice on top! Here is how you can make your own Fresh Strawberry Cupcakes complements of Life, Love & Sugar. The homemade strawberry frosting was beyond addictive! I may or may not have had some just by itself. Cupcake Ingredients- 1 2/3 cups flour
- 1 cup sugar
- 1/4 tsp baking soda
- 1 tsp baking powder
- 3/4 cup butter, room temperature
- 2 eggs
- 2 tsp vanilla
- 1/2 cup sour cream
- 1/4 + 1/8 cup milk
- 3/4 cup chopped strawberries
| Icing Ingredients- 1/2 cup salted butter
- 1/2 cup shortening
- 4 cups powdered sugar
- 6 tbsp strawberry puree
- 1 tbsp water or milk (only if needed)
| Instructions- Preheat oven to 350 degrees.
- Whisk together flour, sugar, baking soda and baking power in a large mixing bowl.
- Add butter, eggs, vanilla, sour cream and milk and beat on medium speed until smooth.
- Fold in the strawberries.
- Fill cupcakes liners a touch more than half way.
- Bake for 18-20 minutes.
- Allow to cool for 2-3 minutes, then remove to cooling rack to cool completely.
- While cupcakes cool, make the icing. Beat together butter and shortening until smooth.
- Slowly add 3 cups of powdered sugar. Mix until combined.
- Mix in the strawberry puree.
- Add the rest of the powdered sugar and mix until smooth. If you need to add water or milk until icing is desired consistency.
- Once cupcakes are cool, pipe on the icing.
**This recipe makes about 24 cupcakes. I halved the recipe and only made 12 for Mother's Day. I had so much fun celebrating Mother's Day this past weekend! What did you do with your mom?xoxo Megan You might also like...
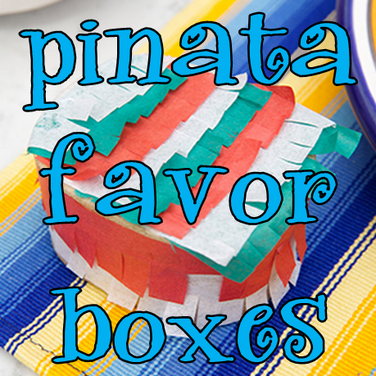
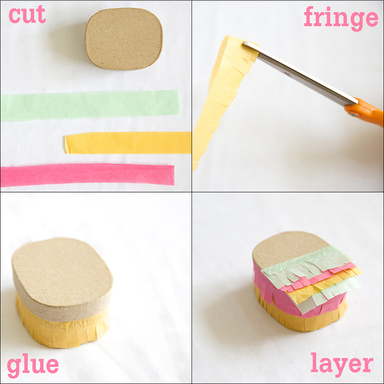
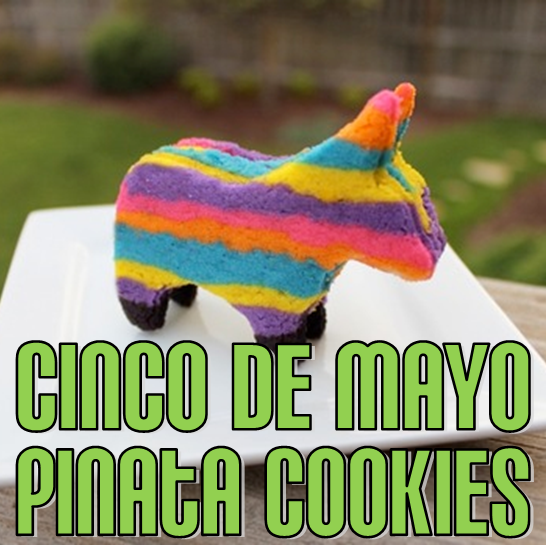
Some of you may recall that this past Halloween I made my very own pinata costume. While I will not be pulling the costume back out for Cinco de Mayo on Monday (yes I still have it in my closet...it took way too long to make for me to just throw it away!), making the pinata dress had inspired me to track down some more pinata craft ideas for the upcoming fiesta celebrations. Here is one great party favor idea you can make for all your guests... Pinata Favor Boxes from blogger Ilana SaulYou will need: - mini cardboard or papier-mâché gift boxes
- crepe paper or tissue paper in multiple colors
- glue
- scissors
Instructions - Cut long, one-inch wide strips out of your paper.
- Take each strip, and using your scissors, cut fringe into one side of the strip.
- Line up the bottom of your fringe with the bottom edge of your box and glue. You only need a little bit of glue to get your paper to stick.
- Continuing to work from the bottom up, in alternating colors, layering as you go.
- Fill your boxes with party favors, like bright colored candies, nail polish, lip gloss or mini tequila bottles, and get ready to put a smile on all your guests’ faces! Just be careful that they don't walk away with multiple pinata party boxes!
And of course if you really want to get into the Cinco de Mayo spirit, you can always go for the best dressed and make your own pinata costume. I'm not going to guarantee it, but you probably won't have to pay for a single drink all night if you show up to celebrate wearing a pinata costume. How are you planning on celebrating Cinco de Mayo on Monday?xoxo Megan You might also like these other Cinco de Mayo ideas...
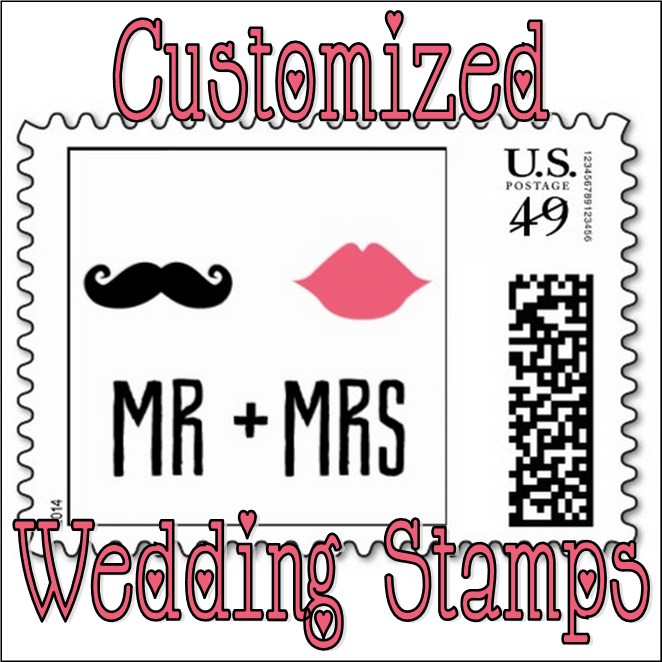
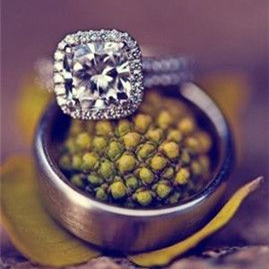
I will admit it now: I absolutely LOVE looking at stationary, especially wedding stationary. I love the different designs, the way you can have your party theme reflected in your invitations, and the way that a font can really accent the invitation perfectly. But above all that I love that invitations are 100% customizable and that you can even create them from scratch. There are just so many opportunities for creativity with them! So, when my aunt sent me a link about NetStamps I fell in love! They have some of the cutest wedding designs to choose from as well as a plethora of other holiday themes. However, what really caught my eye was that they have a "create your own" option. Why have I not thought about this before? I have never once thought to create your own stamps for an event - especially a wedding. All you need is an image that you would like to upload and you are good to go! How easy is that?!?! And if you don't want to create your own customized stamps you can also choose from one from their wedding stamp collection. They have so many cute ones to choose from, like these below! What do you think about creating your own stamps for your wedding stationary? It would be such a cute idea to choose an engagement picture to put on them!
xoxo
Megan
You might also like...
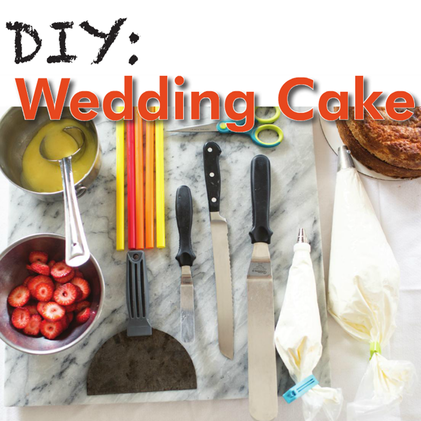
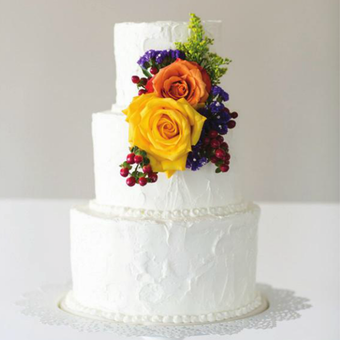
When it comes to deciding what to include and what not to include for your wedding - a cake is one of those things that can be pretty hard to take out. Many brides will get a little sticker shock when it comes to getting a price quote for their wedding cake. This cost can range anywhere from $1.50 to $12 per slice of cake (and we aren't talking about how you would slice a cake at home either) largely depending on where you are getting your cake from, the level of detail and if there is a cake cutting cost at your venue. However, if you are a crafty bride and know your way around the kitchen a DIY wedding cake might be the perfect way to have your cake and eat it too! This probably won't be the easiest DIY project you will ever take on, but I found some great tips from Anita Gupta who runs the specialty cake bakery, Maliha Creations, in Charlottesville, Virginia. To create this DIY cake you will need: - 2 of each 6", 8" & 10" round cakes in your favorite flavor(s)
- 2 cups of cake filling
- 15 cups of buttercream
- fresh sliced strawberries
- small amount of fondant
- cake turntable
- a serrated knife
| - sturdy straws (bubble tea straws)
- a bench scraper
- cake palette knives in various sizes
- buttercream in piping bags
- scissors
- cake card boards (6", 8" & 10")
- fresh flowers for decoration
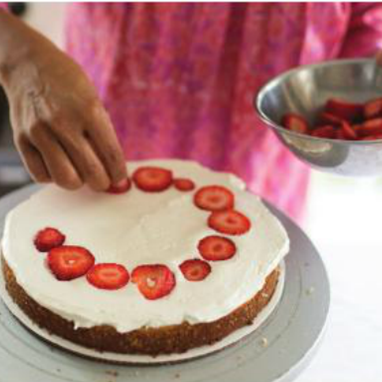
| Step 1
Begin by torting (slicing horizontally) your cakes. Place your cake on a turn table and put your hand on top of cake. While rotating the turntable, slice through the cake horizontally. Do this for each cake and you will end up with 12 cake rounds (4 of each size).
Step 2
Place one 10" round cake on cake board. Add a large dollop of buttercream and smooth to the edges. Add fresh strawberries (or choice of fruit) to buttercream.
Step 3
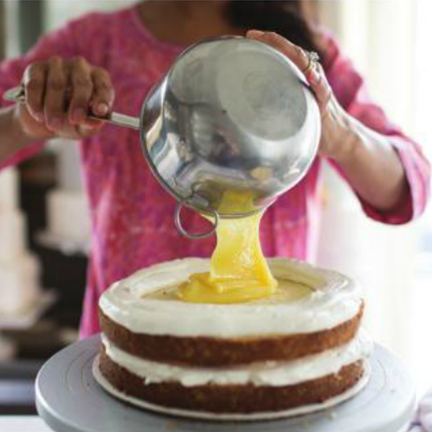
Place another 10" round on top of strawberry/buttercream layer. To add a soft filling, like lemon curd, use piping bag filled with buttercream to pipe a buttercream dam. This will hold the filling in and prevent leakage. Fill center with lemon curd. Step 4
Repeat with another 10" round and strawberry/buttercream layer. Add final 10" round on top. Cover entire 10" round cake with buttercream and refrigerate until cold.
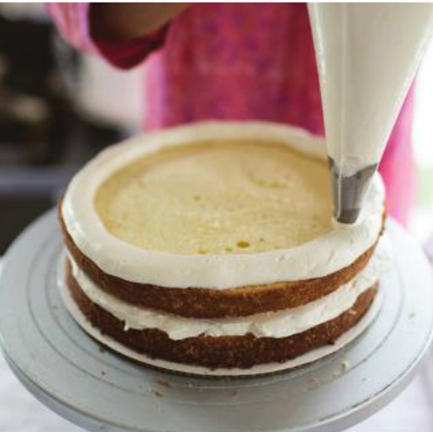
Step 5
After cake has been refrigerated, add more buttercream in thick layers. Using cake board as guide, use bench scraper to remove excess and smooth sides. For a more rustic look, use the small palette knife to create texture on the buttercream. Repeat steps 1-5 with 8' round and 6" round cakes.
Step 6
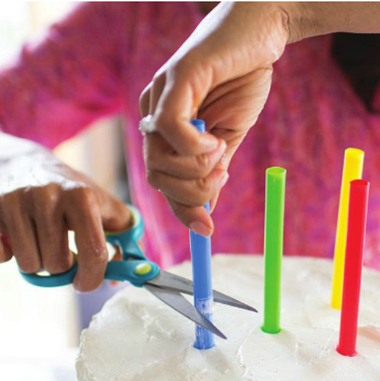
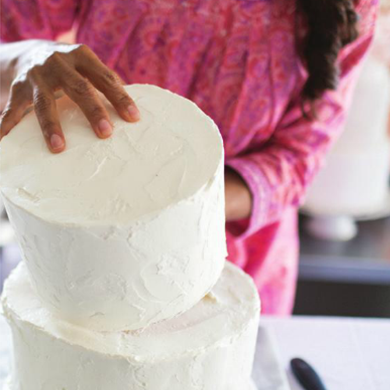
After all 3 tiers have been filled and frosted, the cakes will be stakes. On bottom 10" tier, place 6 bubble tea straws into the cake and push down until the board is reached. Then lift gently and cut straws at the frosting mark. Push straws back into the cake. Take a small amount of fondant and wet slightly. Flatten and put on top of the cake. This will act as the glue to hold the next tier on the cake. Step 7
Place the 8" tier on top of the 10" tier and center. Repeat the insertion of straws and the fondant glue. Place the 6" tier on top and your cake is now stacked and complete! You are now ready for the decoration!
Step 8
Using the piping bag with buttercream, pipe pearls (aka dots) around each tier to create a border.
Step 9
To safely insert fresh flowers into your cake, just trim the stems to about 2" and place the stem into the straw. The flowers can now be inserted into the cake without worrying about the flowers contaminating the cake.
Step 10
Continue adding flowers (or other decorations) until the cake is finished. Your cake is now complete! Have you had success making a tiered cake for a wedding or other event before? I would love to hear about your cake making making and decorating tips in the comments section below!
xoxo
Megan
You might also like...
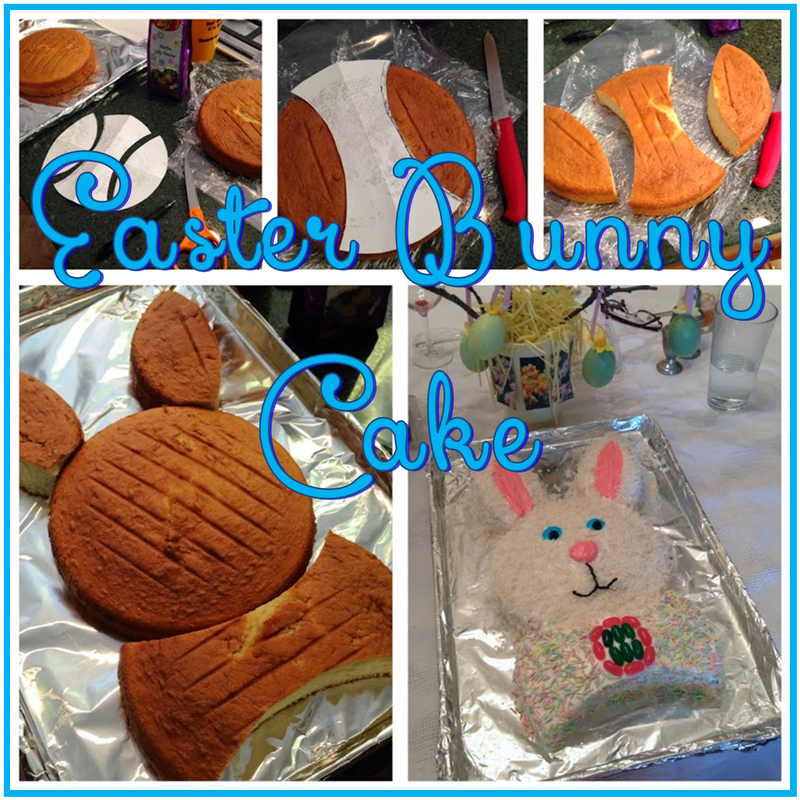
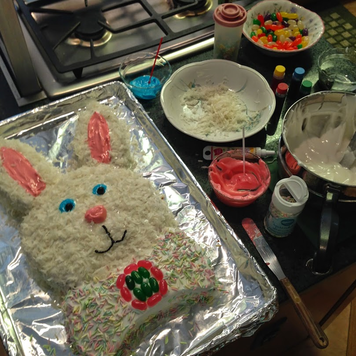
Yesterday I had so much fun celebrating Easter with my family. We started off the morning at church and then all headed back to my parent't house to see what the Easter bunny left. My sister brought over a delicious quiche and while that was heating up we had fun going through all our baskets and exchanging cards. I can't wait to enjoy all my Easter goodies that the bunny left me, especially my Goldfish vanilla cupcake grahams! YUM!! After we enjoyed brunch (and a few goodies from our Easter baskets), I had was assigned the fun task of creating our Easter dinner dessert - a bunny cake! My mom had already baked the cakes (big time saver there!) so all I had to worry about was creating the cake and decorating it. I could not wait to get started! Here is how I made our Easter Bunny cake...
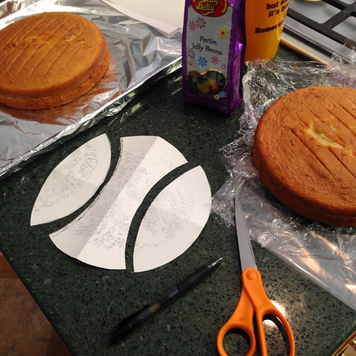
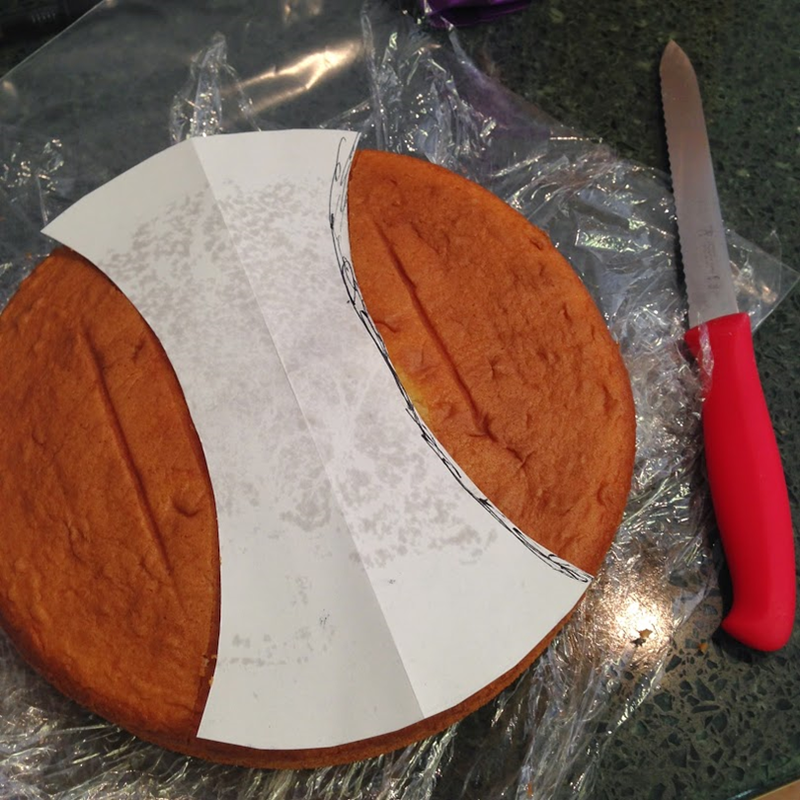
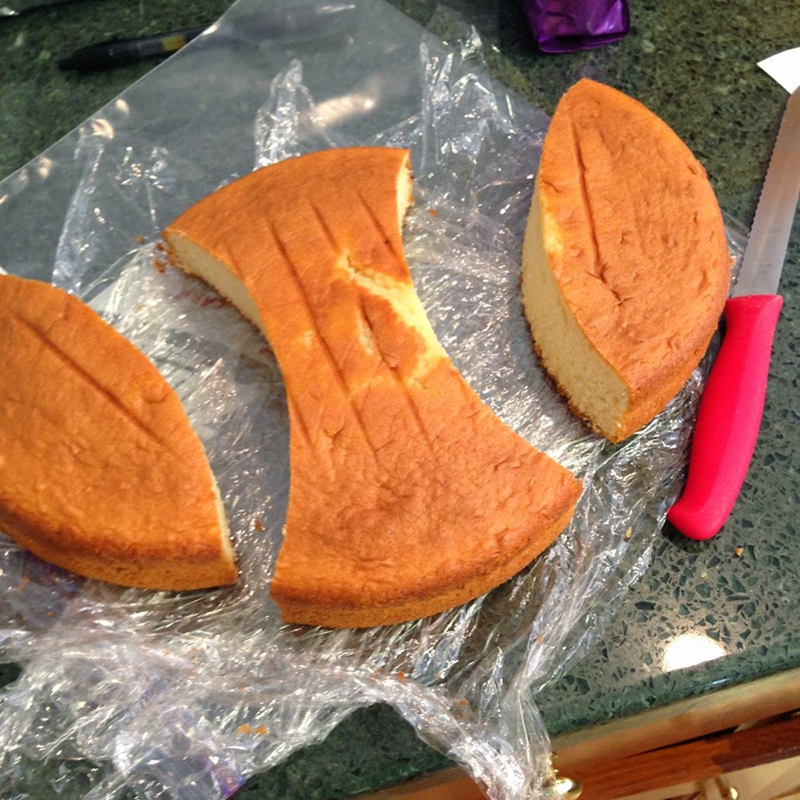
1. Bake 2 - 9' round cakes and let cool. **tip: Since you have to cut one of the cakes make sure they are completely cooled to prevent excess crumbling. If you have time make your cake and allow it to sit in the fridge for a while.
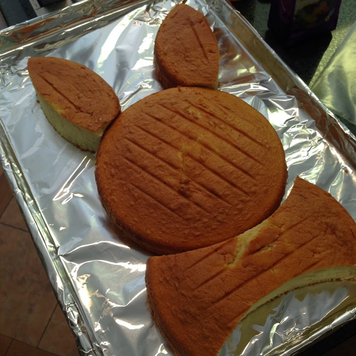
2. When you are ready to decorate gather your icing (I used my mom's homemade 7 minute icing), food coloring, coconut flakes, anything else you want to decorate your bunny with, your 2 cake rounds and a knife. For those who may feel the need for perfect symmetry you will also want a piece of paper, scissors and a pen or pencil. I took one of my cake rounds, put it on top of my sheet of paper and traced around it (our pans were already put away). Next, I cut out my circle, folded it in half and then cut an arc. This will give you your center bow tie and your two bunny ear patterns. 3. Next, take your bow tie patter and place it on top of one of your cake rounds. Take your knife and cut along each side of your pattern. You will end up with your two ears and your center bow tie when you are done. For those who don't want to use a pattern during this step cut two arcs, one on either side, to create this same look. 4. Once you have all your cake pieces you are ready to create your bunny and decorate! 5. And here is the decorated bunny! You can see I take my cake decorating responsibility very seriously. Everyone loved the decorated Easter bunny cake after dinner and I had so much fun decorating it! I did learn one thing though, icing does not like to stick on top of coconut flakes very well, which is why my bunny has no whiskers. (oops!)
How did you celebrate Easter this past weekend? Did you make a bunny cake like I did? I hope the Easter bunny left you something yummy!
xoxo
Megan
You might also like...
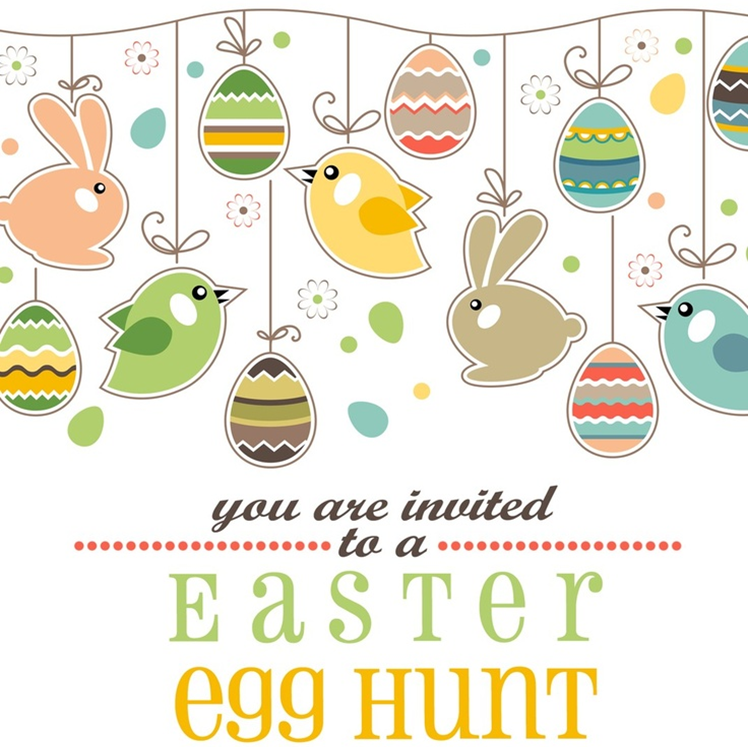
Happy Easter to you all! Between enjoying your Easter brunch and going on the egg hunts I hope everyone has a wonderful day celebrating with their family and friends. Have a wonderful Easter!
Now where did that bunny hide my Easter basket this year?
xoxo
Megan
You might also like these Easter ideas...
|


 RSS Feed