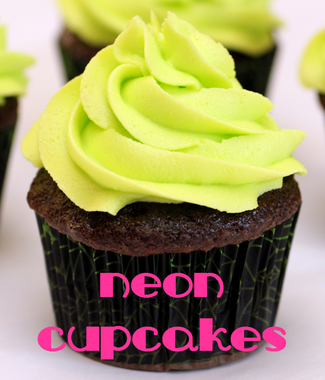
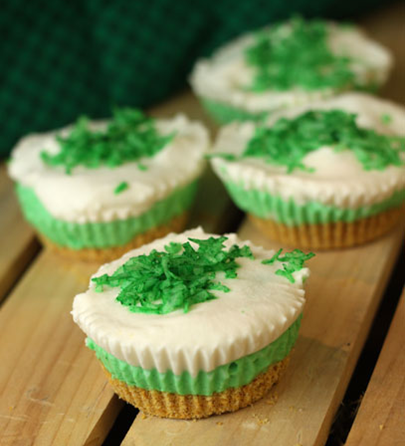
I can't believe that summer is almost over! Summer is by far one of my favorite times of the year with vacation, great outdoor events and all things bright. As a fun way to bring summer to a close I though that these neon cupcakes would brighten your day. Earlier this summer I showed you how to color the batter to make some fun colored cupcakes, today I am going to show you how to make your cupcakes glow! I found this recipe is from Recipe Snobs.
To make this neon frosting you will need:
- 7 cups confectioners' sugar
- 1 cup vegetable shortening
- 1 teaspoon clear vanilla extract
- 5 tablespoons tonic water (diet works too)
- neon food coloring
- package of neon colored gelatin
- 1 cup boiling water
- 1 cup chilled tonic water
Instructions:
1. Prepare cupcakes per cupcake instructions. Once cooked, set aside and allow to cool.
2. To make frosting start by adding confectioners' sugar, shortening, vanilla and 3 tablespoons tonic water into a large bowl.
3. With an electric mixer beat until smooth.
4. Add the 2 remaining tablespoons tonic water and mix on high speed for about a minute to allow the frosting to become light and fluffy.
5. Add neon food coloring to frosting until it reaches the desired neon color.
6. Pipe colored frosting onto cooled cupcakes and place into freezer for at least half an hour to set frosting.
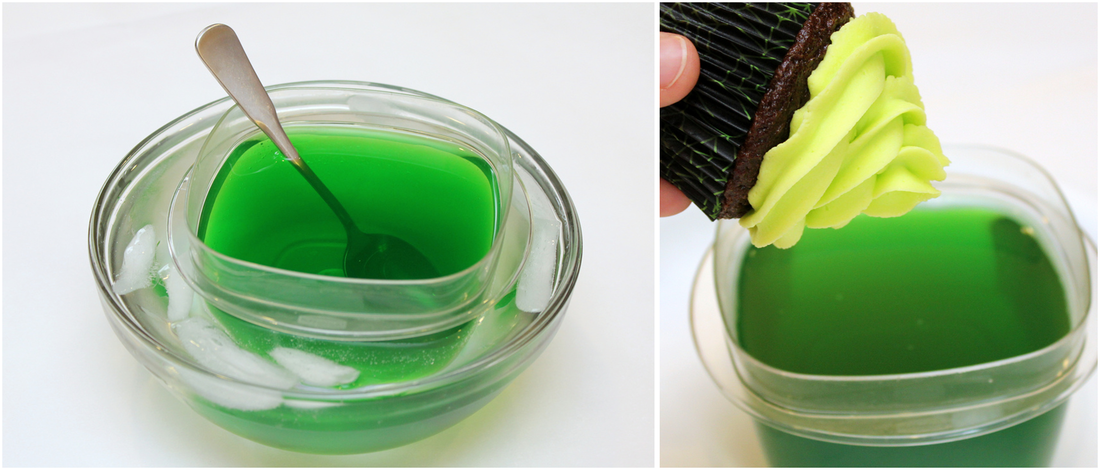
7. After letting the cupcakes freeze, make the glowing finish by combining the gelatin mix to 1 cup boiling water.
8. Stir mixture for about 2 minutes then add the 1 cup of chilled tonic water.
9. Transfer to a container and place the container into an ice bath, like pictured below left. 10. Gently stir gelatin for 5-10 minutes or until gelatin is cooled.
11. Once cooled, remove cupcakes from the freezer and dip the frosting into the gelatin.
12. Return the cupcakes to the freezer and let the gelatin set for about 1 minute.
13. Repeat steps 11 & 12 3-5 more times to get the best glowing results.
14. Refrigerate cupcakes until you are ready to serve. To get the best glow place your neon creations under a black light and watch them glow!!
Are you going to try these neon creations?
xoxo
Megan
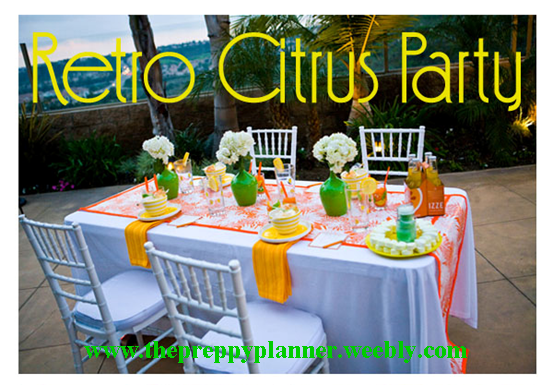
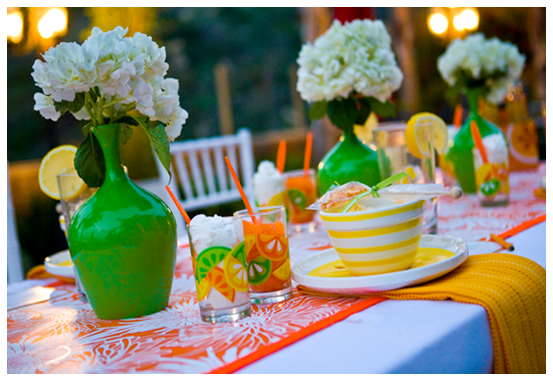
As the summer is winding down and the last of the summer 3 day weekends coming up I thought it would be fun to go a little retro in this week's themed Thursday. At the end of the summer it is always a great time to get all your friends together for one last big party weekend and what better way to do so than going old school!! I found this amazing retro citrus party theme from Lollipop Events and Designs. This retro citrus party includes lots of DIY party decor that I just love and you can coordinate it for any occasion be it a shower, birthday party or just a fun get together. The focal point of this retro tablescape is the amazing wrapping paper table cloth. To make this table runner all you need is a wrapping paper of your choice and a spool of grosgrain or felt ribbon. Unroll the wrapping paper and cut it the length that you want it. To attach the ribbon take some craft glue and glue the ribbon to the edge of the paper. It will make the runner look like you bought it at the store and you can make as many different ones as you like.
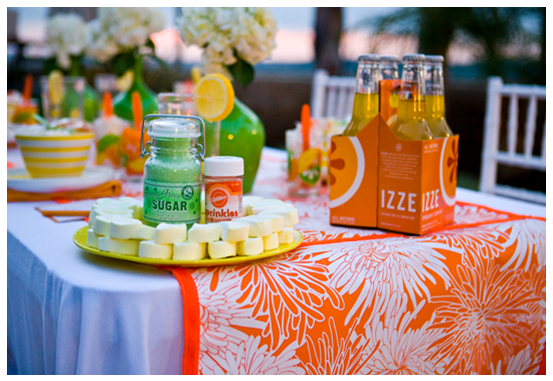
The second DIY project to create this tablescape is the flower arrangements. To make these vases you just need a great spray paint and a few vases. A nice bright color, like this apple green, really pops against the table runner and makes the whole table arrangement stand out. Make sure you get a spray paint that works on glass so that the paint doesn't peel off after one use. To finish out this table set-up use a third color that is bright and festive, like a lemon yellow, in your napkin, plates, bowls, and cup selection. With bright neon colors in all out fashion, decor and accessories it is easy to find table accessories to create this amazing citrus table arrangement.
What neon creation would you create for an end of summer party?
xoxo
Megan
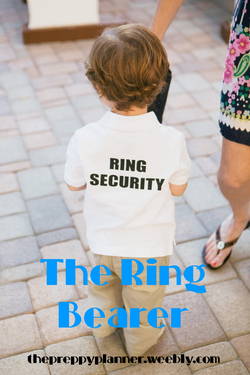
One part of planning your wedding includes deciding if you want to have a ring bearer. Having a ring bearer can be a great way to incorporate a younger member of your family and makes the kids feel included in your big day.
When choosing a ring bearer it is nice to keep in mind the age of the child so that you know what they will and will not be able to do. If they are under the age of 3 it is best to not give them anything that is wooden or that has the rings on them. However, if they are older you can get pretty creative with what you would like them to tote down the aisle on your wedding day. With that in mind today I have put some creative ideas together that you can make or buy for your own ring bearer.
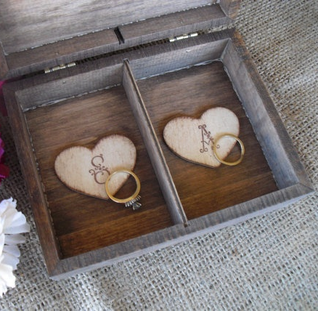
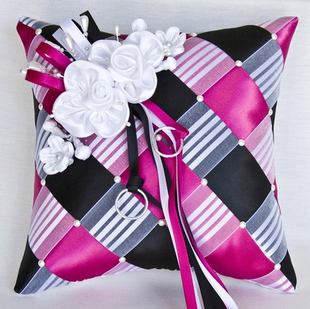
If you want to sick with the classics for your ring bearer there are two ways you can go: pillow or box. Having a customized box made for your rings, like this one from DazzinglingExpressions on Etsy, gives you a nice keepsake for after the wedding. You can get it personalized with his and her initials, carve one into a classic heart or buy one from where you got engaged. The options are endless. The other classic option is the pillow. If you have a younger child acting as your ring bearer this can usually be the safest option. You can tie fake rings onto the pillow and you know that they can't hurt themselves with it. To customize the pillow you can have it made in your wedding colors, like this one from SiSiCreations on Etsy. A third option, if you want to get a bit more creative, is to make a sign for your ring bearer to carry down the aisle. This option is best if your ring bearer is above the age of 3. There are multiple different options that you can choose from when you make a sign. One way is that you can create a wooden sign, like the one that I made for my friend's wedding. I personalized that wooden sign using their wedding colors and the groom's name. Another option is to make one that will hang around the ring bearer's neck with ribbon. A third option, and one that I love is the one below. I found this one from a Style Me Pretty inspiration board. Just how adorable is that sign idea! No matter what you choose you can add your own personal touch to your selection either through the addition of initials, colors, or by making it yourself. What would you have a ring bearer carry down the aisle? You can find these and more great ring bearer ideas by following me on my Pinterest page @PreppyPlanner.xoxoMegan
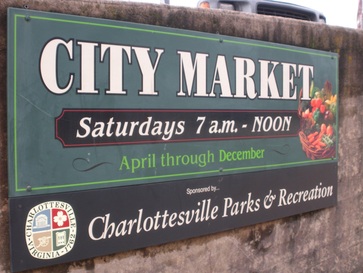
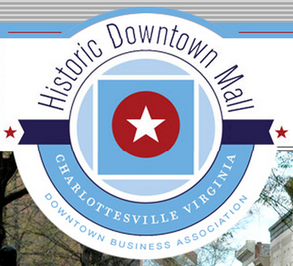
With a move to a new city comes new events to attend, places to go and things to do. This past weekend I moved to Charlottesville and can't wait to go exploring. To keep me busy I decided to create a list of ten events that I want to try and get to this fall. So, if you are ever in the area and need something fun to attend make sure that you check out one of these must-see events this fall.
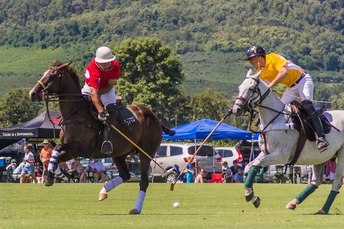
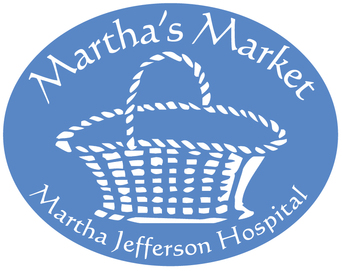
1. Polo Match at King Family Vineyards; Sundays through Mid-October 9. Attend the Fundraiser, Martha's Market, at John Paul Jones Arena; October 12-14th I can't wait to get started on this list of things that I want to do this fall. What is your favorite event to attend in the fall?
xoxo
Megan
Happy Monday! I hope everyone had a great weekend full of fun. I didn't have any events going on this past weekend as I spent all day Saturday moving. Today I started a new job as an event coordinator!! With moving to a new place I decided to do a little research on some fun events in Charlottesville, Virginia. You will have to check back tomorrow for a list of ten can't miss things to do and attend in the Charlottesville area that I have put together.
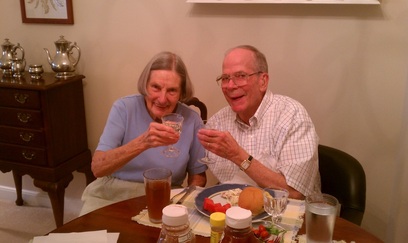
I did have one big celebration that I attended last week. My grandparent's celebrated their 65th wedding anniversary last Thursday. My family went over and made dinner for them to celebrate this special occasion with them while we were all in town. Below is a picture that I was able to get of them toasting to their 65 years of happiness. We had so much fun and they just love it when everyone is able to get together!
After celebrating my grandparent's anniversary last week I have be going nonstop. Once I get all settled into my new place and job I can't wait to start exploring what there is to see and do in Charlottesville. I love new places as that also comes with new events to attend and to take part in. What is your favorite thing to do or place to go where you live?
xoxo
Megan
p.s. ~ I have some great news that I will be sharing about later on this week that you will have to keep an eye out for too!!
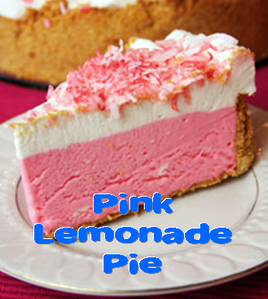
With all that pink inspiration from yesterday's Pretty in Pink party theme I just couldn't resist in carrying on the pink theme through today. This pink lemonade pie is super easy to make, beyond delicious and the best part is that it does not require any baking!! I found this recipe from The Prepared Pantry. This treat is broken down into 3 parts: the crust, the filling and the topping.
The Crust
- 1 1/2 cups graham cracker crumbs
- 1/4 cup sugar
- 4 tbs butter
1. Mix the crumbs, sugar and butter until the mixture is uniform in a 9 in pie pan or spring form pan.
2. Press the crumbs into the bottom of the pan and up the sides in a nice even layer to form the crust.
3. If you want a crispier crust you can choose to bake this for 8-10 minutes at 350 degrees.
4. Once baked, remove from oven and set aside to cool.
The Filling
- 1 8oz packet of cream cheese, softened
- 1 14oz can of sweetened condensed milk
- 3/4 cup pink lemonade concentrate (not mixed with water)
- 2 tbs lemon juice
- red food coloring
1. In a large bowl soften the cream cheese with an electric mixer.
2. While mixing, slowly pour in the sweetened condensed milk, scraping the bowl as you go.
3. Once milk is fully blended, continue mixing while slowly adding the lemonade concentrate and lemon juice.
4. While ingredients are all blending add the desired amount of food coloring to create the pink color.
5. Once mixed, pour the filling into the pie shell and place it into the freezer.
The Topping
* If you choose to buy a premade whipped topping skip down to step #2.
- 1/3 cup shredded coconut
- red food coloring
- 1 cup whipping cream
- 3 tbs sugar
- 1 tsp vanilla extract
1. Using an electric mixer, whip the cream until stiff while adding the sugar and vanilla in the process.
2. When the pie filling is slightly stiff on top, gently spoon the topping onto the pie.
3. To garnish place the coconut in a ziplock bag, add a drop of food coloring, and shake until it turns pink.
4. Place the pie back into the freezer. When the pie is completely firm it is ready to serve!
This pie is great to serve during the summer, but you can also change up the colors to coordinate it to any holiday during the year. You can keep the same mixture and change the food coloring color or you can also change the type of concentrate and flavoring to make your own flavor creations. Another twist that you can take on this recipe is to turn these into cupcakes. The possibilities are endless!
Are you going to make one of these easy, no-bake pies? Let me know what combination you choose to create!
xoxo
Megan
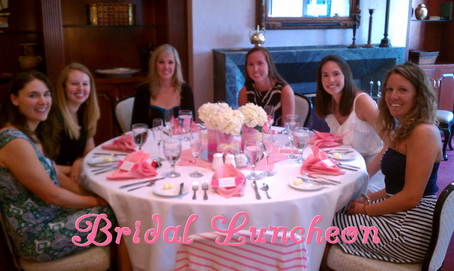
On Monday I shared some pictures from last weekend's wedding festivities. However, I saved sharing one of the events, the bridal luncheon, for today. As a gift to the bride, my mother offered to host a bridal luncheon the Friday before the wedding. When her and my sister went to go find invitations for the event she came across the most adorable plates and napkins. We decided that we would take inspiration from those two items to create the decor for the event.
For this luncheon I coordinated with the venue catering director of room setup and menu, created the place cards, centerpieces, and dessert display. Each of the the DIY crafts that I made for this event are so easy to do and can be altered to fit any color options or event theme. The colors that I used for this Pretty in Pink luncheon were pink, blue and yellow.
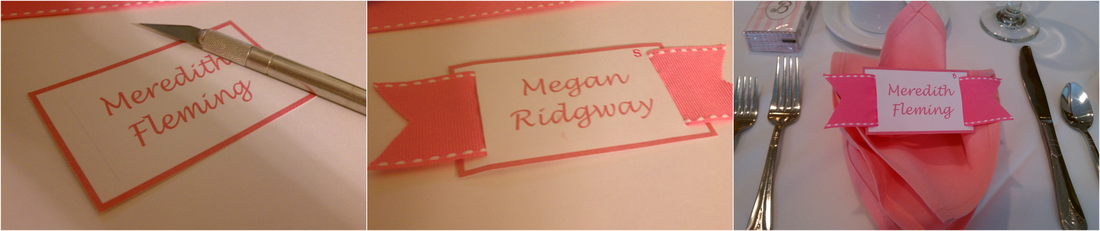
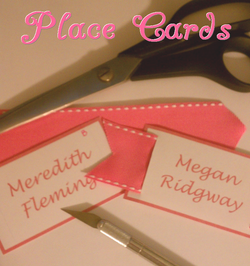 I found the idea for these place cards from good old Martha Stewart. I altered her instructions a little bit and created these for the event. With our theme I chose to create all the place cards with pink ribbon and coordinated the color of cards with their lunch choice.
To make these you will need card stock, scissors, an x-acto knife, and ribbon. First I created the place cards on the computer, then printed them onto the card stock. In the design of them I included a very faded line that I would be able to follow to cut the slit that the ribbon would go through. After they were printed I used the scissors to cut out each place card. I then used the x-acto knife to cut two openings for the ribbon. Last, I threaded the ribbon through and cut the edges.
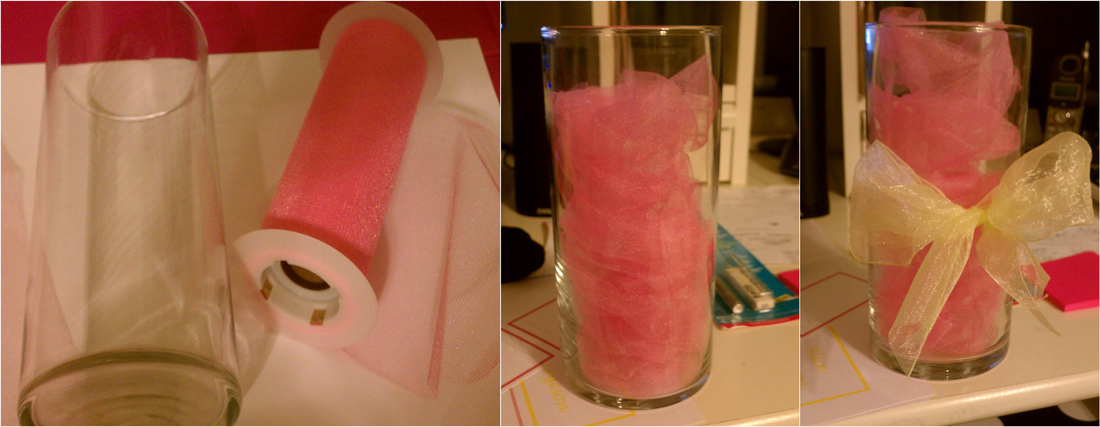
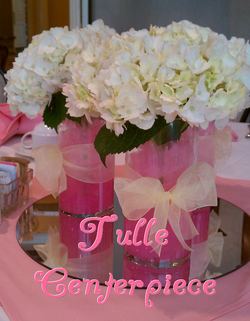 The second DIY craft that I put together were these tulle centerpieces. The flowers that were going to be used in the wedding were hydrangeas, and became the flower of choice for the luncheon. When it comes to picking out your flowers you don't have to spend a lot on the arrangement. Selecting flowers that have large blooms, like these, allow you to use just one or two stems per arrangement.
To create these arrangements you will need a roll of tulle, a roll of ribbon, scissors, vases, flowers and water. To start I the tulle into approximately 8 foot pieces. Next I rolled the tulle up so that it would fit inside the vase. I then took a piece of ribbon and tied a small bow around the middle of the vase. Once I was at the venue I added water to about the halfway point (water doesn't damage the tulle and actually helps it stick to the sides of the vase) and then added one stem of hydrangeas to each vase. And tada! You now have an amazing centerpiece!
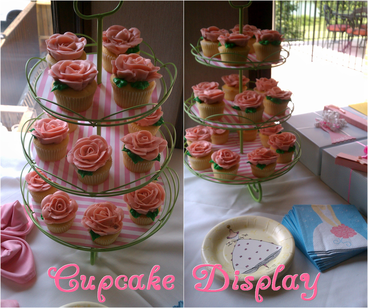
The last item that I made was the display stand for the cupcakes we custom ordered from Pearl's Cupcake Shoppe in Richmond. To start I already had the wire cupcake stand that I bought a few years ago on sale at Target. Once you have a stand all you need to do is to buy sheets of 12x12 inch scrapbook paper. I picked out adorable pink and white stripped sheets for this display to keep with the Pretty in Pink theme. Next I cut out a circle that would fit on the inside of each level. To get it to fit I then found the middle and cut a straight line from the edge to the center point. I also made small cuts perpendicular to the cut from the edge, so that it formed an "x" in the middle. To put it all together I folded up each wing of the center "x," slid the paper onto each level and added the cupcakes to the display stand. You can see the plates and napkins, that inspired the event theme, in the bottom right of the cupcake display picture. Each of these crafts don't cost much, can be easily changed for your next event and took no time at all to make. Overall everyone loved the luncheon and it was a great start to the weekend of wedding festivities. Did you have a bridal luncheon before your wedding?
xoxo
Megan
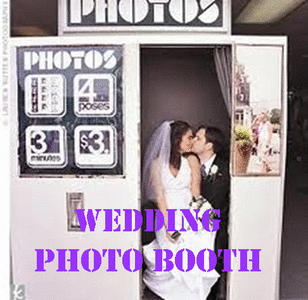
When it comes to capturing memories from your wedding a photo booth is a great option to have. Having a photo booth at your wedding also adds a nice entertainment value to your event as this gives your guests something to do during the evening when they may want a break from the dance party.
There are a couple of options that you can choose from when deciding what kind of photo booth you would like to have at your event. One way to have a photo booth is to create it yourself. You can set up a Polaroid camera, add a props table, and let your guests go to town taking pictures. With your created photo booth you could also hire a photographer to take the pictures of all your guests. Another option for a photo booth is to rent one. These booths can range in rental prices but can be a great way to capture a moment from all of your guests.
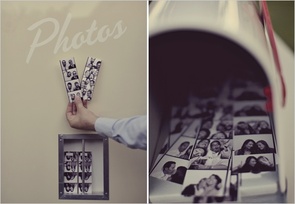
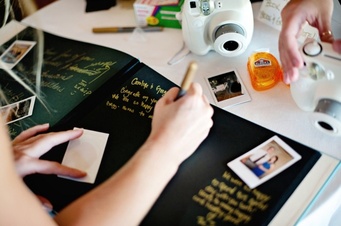
No matter which option you choose your guests will have so much fun. My favorite part is then to take the pictures and turn them into your guest book. Next to the photo booth you can set up a table with a scrapbook, scissors, tape, glue and pens. After the guests have had their pictures taken have them select one to add to your guest book.
After the wedding the bride and groom will have a great keepsake book. Years from now you can look at what everyone wore and remember all the fun memories! Have you created a photo booth before?
xoxo
Megan
When it comes to a dinner party or reception I am always in favor of having place cards. I always hate the idea of having empty seats, couples not being able to sit with each other or people moving chairs around to squeeze everyone in at one table. With place cards there is more order when it comes to guests finding their seat and everyone enjoying the evening. It also comes in handy when you might have ex's or people who don't get along with each other at the same event as you can make sure they are placed at opposite ends of the room.
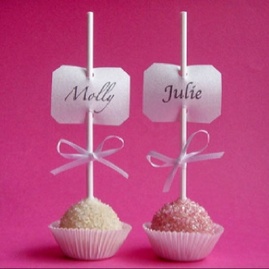
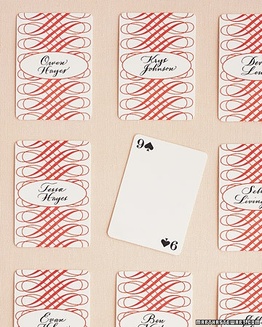
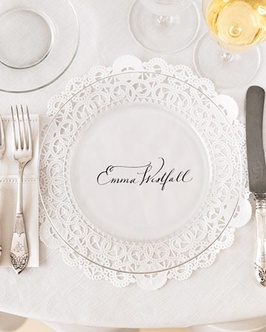
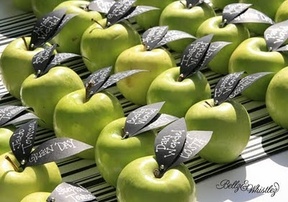
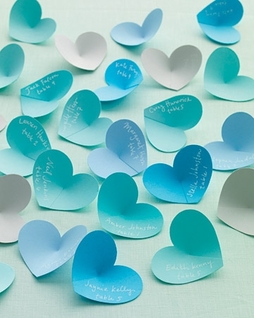
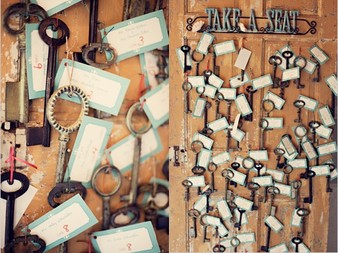
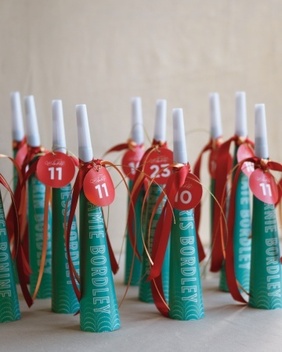
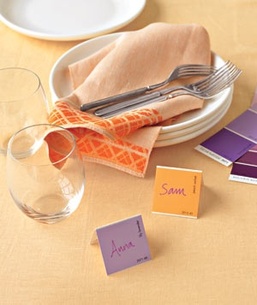
For today's Tuesday Ten I have put together 10 creative place card ideas that you can use at your next event.
1. Button Place Cards 2. Cake Pop Place Cards 3. Playing Card Place Cards 4. Confetti Place Cards 5. Doily Place Cards 6. Fruit Place Cards 7. Heart Place Cards 8. Vintage Key Place Cards 9. Noise Maker Place Cards 10. Paint Chip Place Cards There are so many different ways that you can create a place card for your event. I had such a hard time just choosing 10 to share with you. Which one is your favorite?
xoxo
Megan
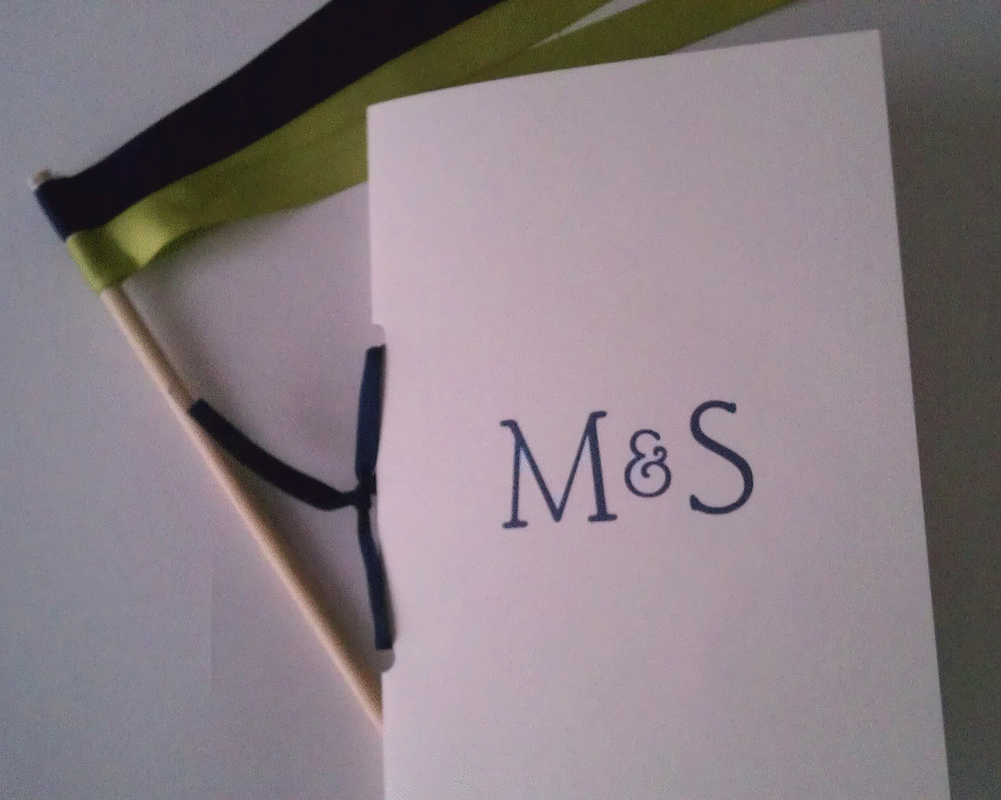
This past weekend I was a part of the wedding of two of my great friends, Meredith and Scott. It was one crazy weekend with the Bridal Luncheon, Rehearsal, and Rehearsal Dinner on Friday and then Saturday was filled with preparation and wedding day celebrations. Meredith and Scott filled their wedding with so many personal touches that really made their wedding their own. 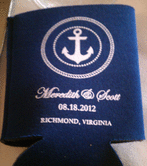 On Friday the rehearsal dinner was at The Boathouse at Rocketts Landing. This place was one that the bride & groom along with all their friends loved to go to while they attended Law School at the University of Richmond the past 3 years. To go along with the evening they had the most adorable koozies for everyone to use that night and at the wedding if they wanted to. When it comes to selecting favors for your guests koozies are always a hit with all the guests.
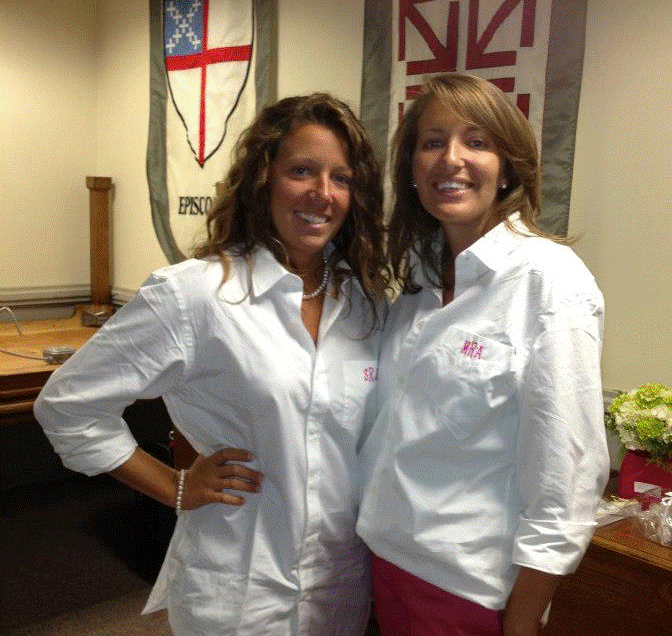
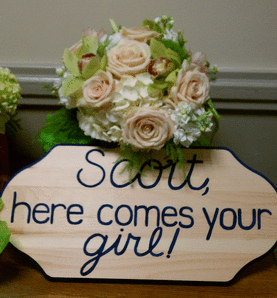
After all the fun on Friday evening we were ready for the wedding day on Saturday. For our bridesmaid gift the bride got each of us a button down shirt, with our initials monogrammed on the pocket in our favorite color. That morning I also created this sign that the ring bearer carried down the aisle. This was an easy craft that I put together using a wooden board from the craft store and acrylic paint in the wedding color. Here is the sign with the bride's flower bouquet. 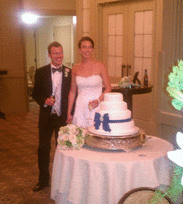 The bride and groom selected an amazing cake for their wedding. They kept it simple with classic white on white decoration for this formal affair. However, they did incorporate their wedding color of navy with a simple wrap around bow and a family heirloom brooch. The bridal bouquet also had a brooch added to it that had belonged to the bride's grandmother. Simple touches like these allow those family members who were not able to be at the wedding to be remembered during a wedding day. Prior to the toasts they also had pictures from each of the bride and groom's parents weddings.
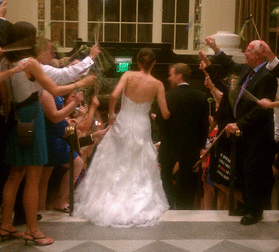
Another creative touch that they decided to add to the wedding was the exit ribbons. They used the wedding colors of navy and green to create the ribbon wands that the guests waved when the bride and groom were exiting. These are a simple craft that you can create with ribbon and dowels. The great thing about these ribbons are they are easy to customize for your our wedding.
This wedding was so much fun and I could not be happier for these two. Tomorrow they will be off to celebrate on their honeymoon and I wish them the best of luck on their marriage!! What personal touch was your favorite in this wedding?
xoxo
Megan
|


 RSS Feed